
ZenHR’s native integration with Odoo allows seamless transfer of employee data, payroll, off-cycle payments, and financial transactions from ZenHR to Odoo. This ensures that organizations can enjoy ZenHR’s user-friendly HRMS capabilities while keeping their accounting accurate and synchronized in Odoo.
ZenHR integrates seamlessly with the cloud editions of Odoo, starting from version 15 and continuing through later versions such as V16, V17, and beyond.
TABLE OF CONTENTS
-
How to Activate This Integration
1. On Odoo2. On ZenHR
-
How to Use Odoo Integration
1. Mapping Odoo GL Identifiers With ZenHR Financial Transactions2. Posting Journal Entries
1. Set Up Journal Entries Structure
2. Posting salaries from ZenHR to Odoo
3. Posting Off-Cycle Payments and Vacation In-Advance Salaries From ZenHR to Odoo
4. Posting Provisions From ZenHR to Odoo - Odoo Event Viewer
How to Activate This Integration
On Odoo: Installing Apps:
Before activating the integration, make sure the following apps are installed in your Odoo system:
Accounting.
Contacts.
Employees.
To install these applications, go to the main menu and open the Apps module:
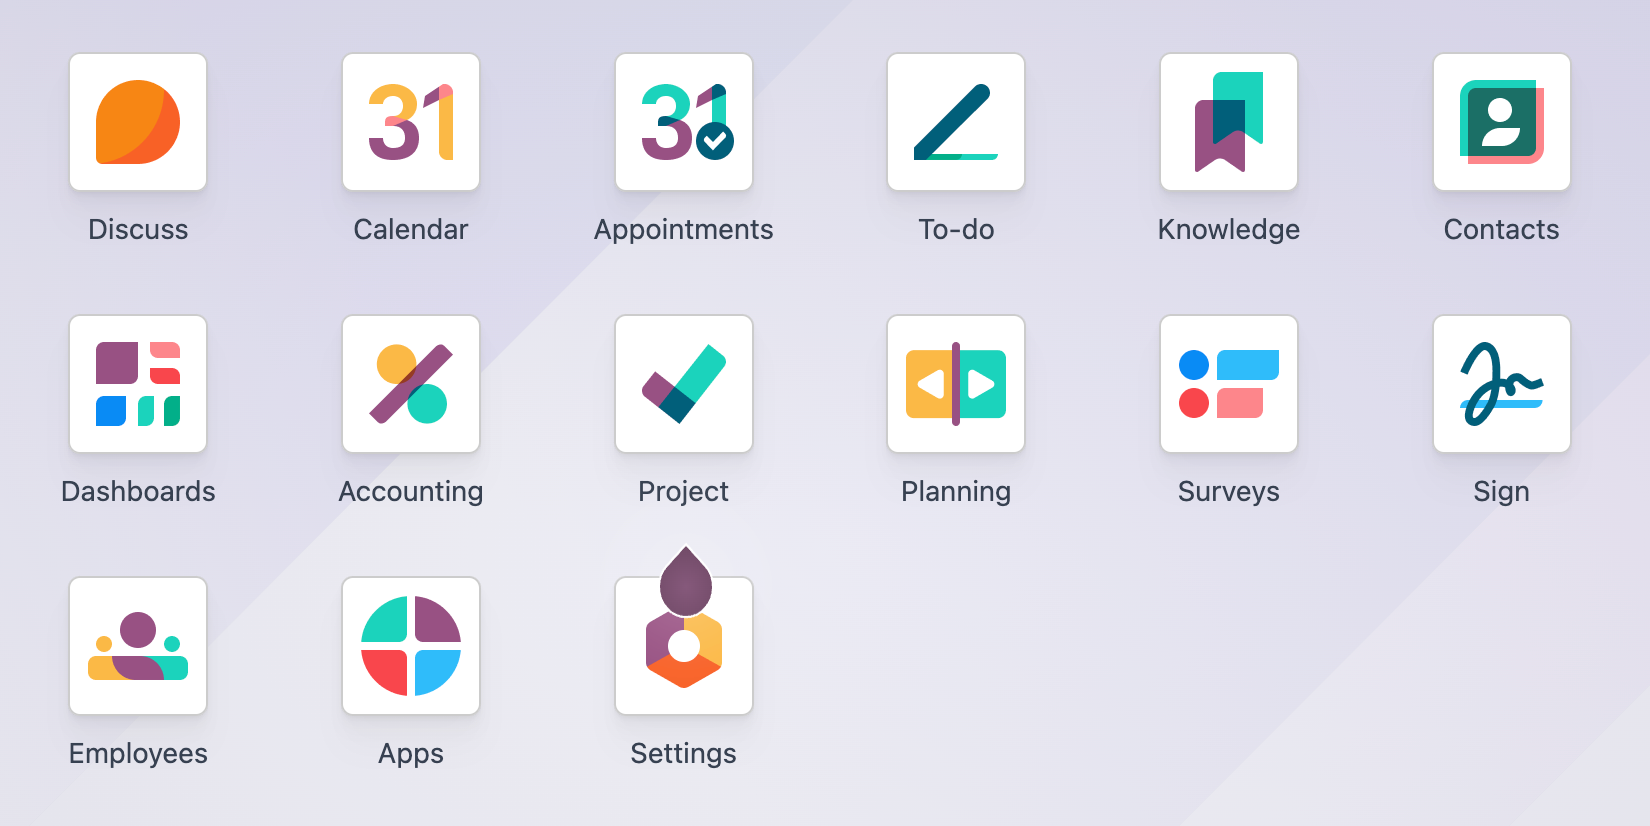
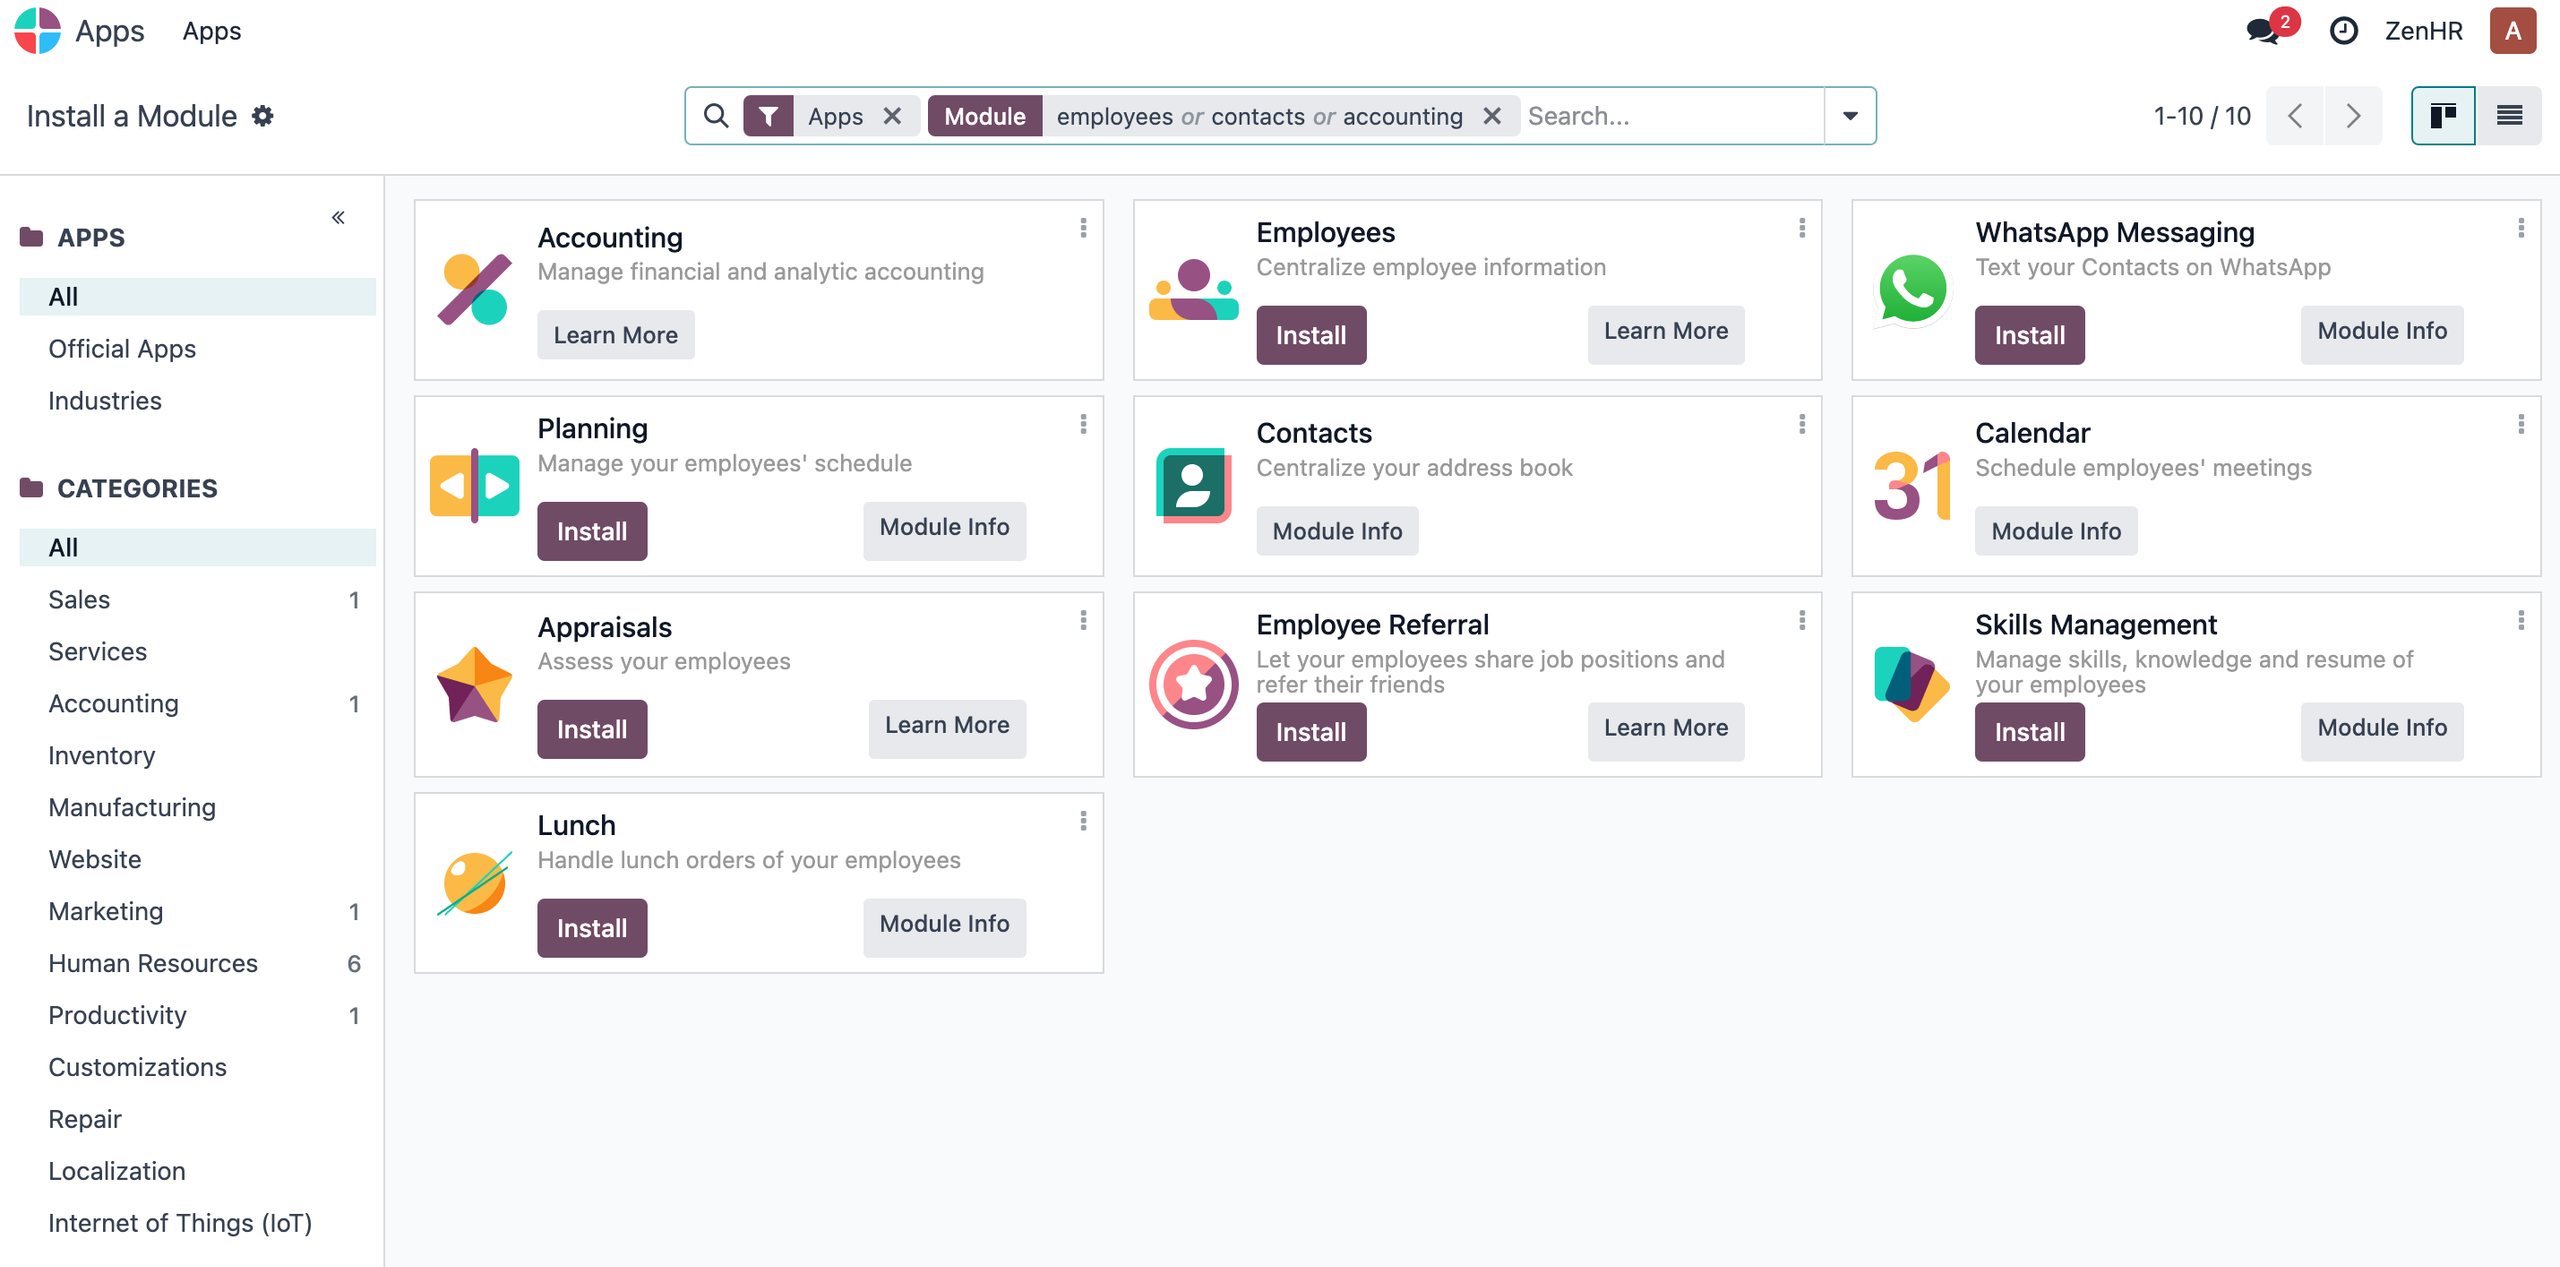
- Search for the mentioned apps and click "Install".
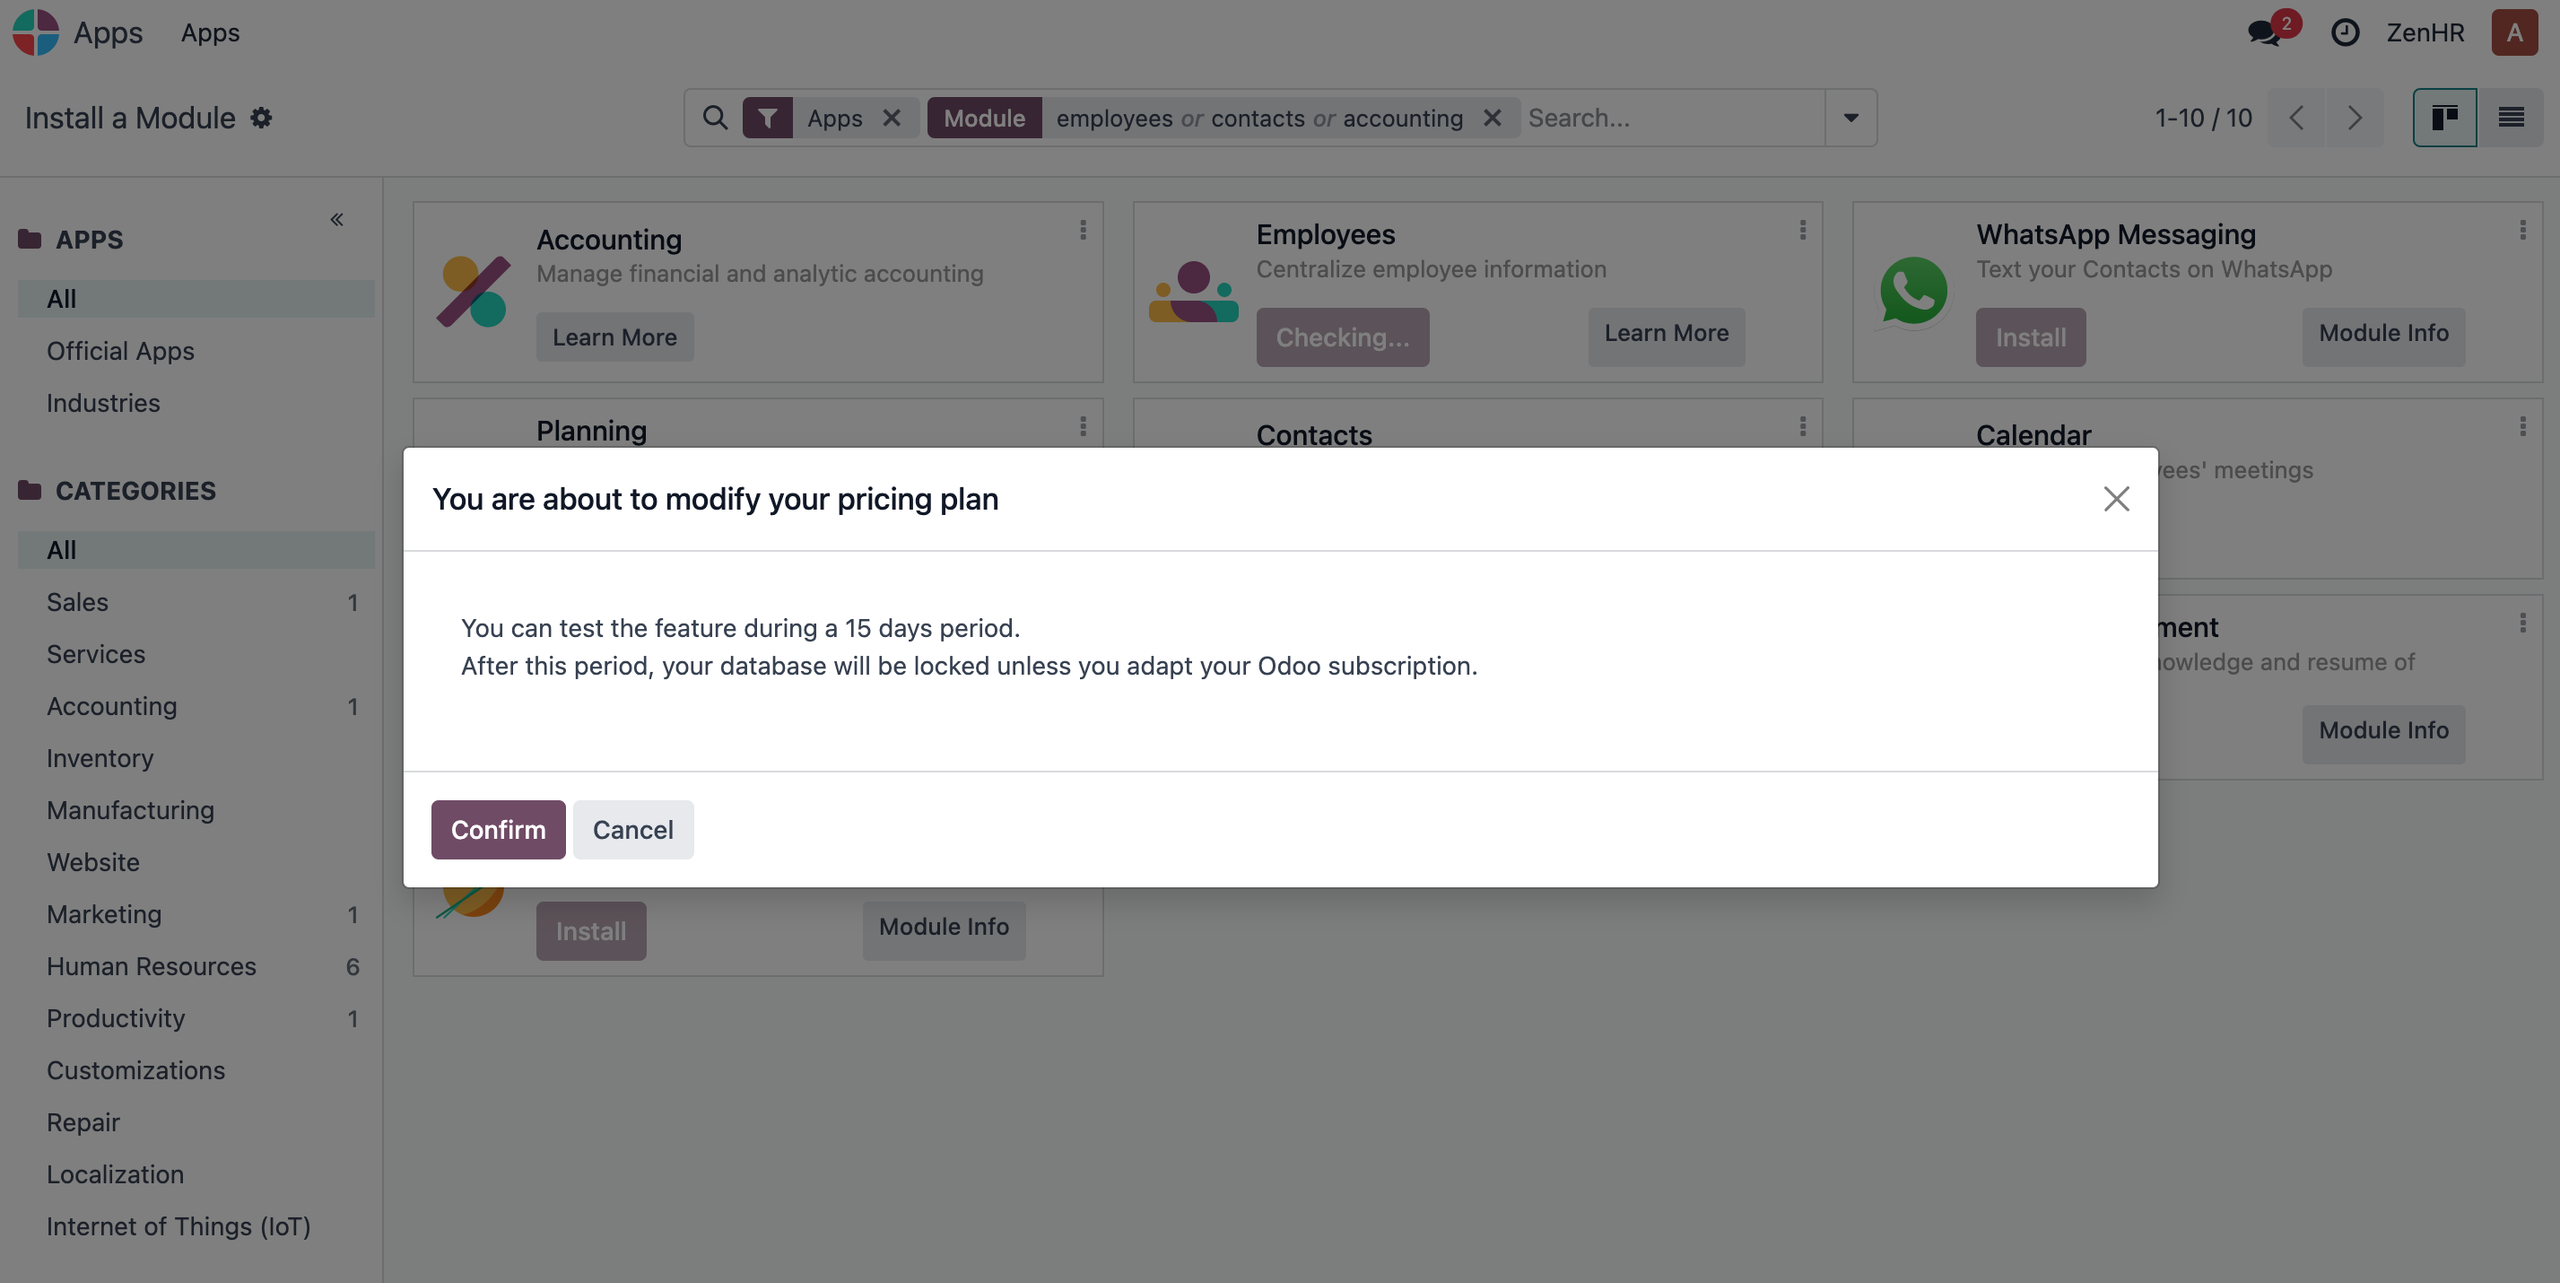
Note : A confirmation message appears to indicate that installing new apps may affect the pricing plan. Confirm with the customer before proceeding and select "Confirm" button to continue..
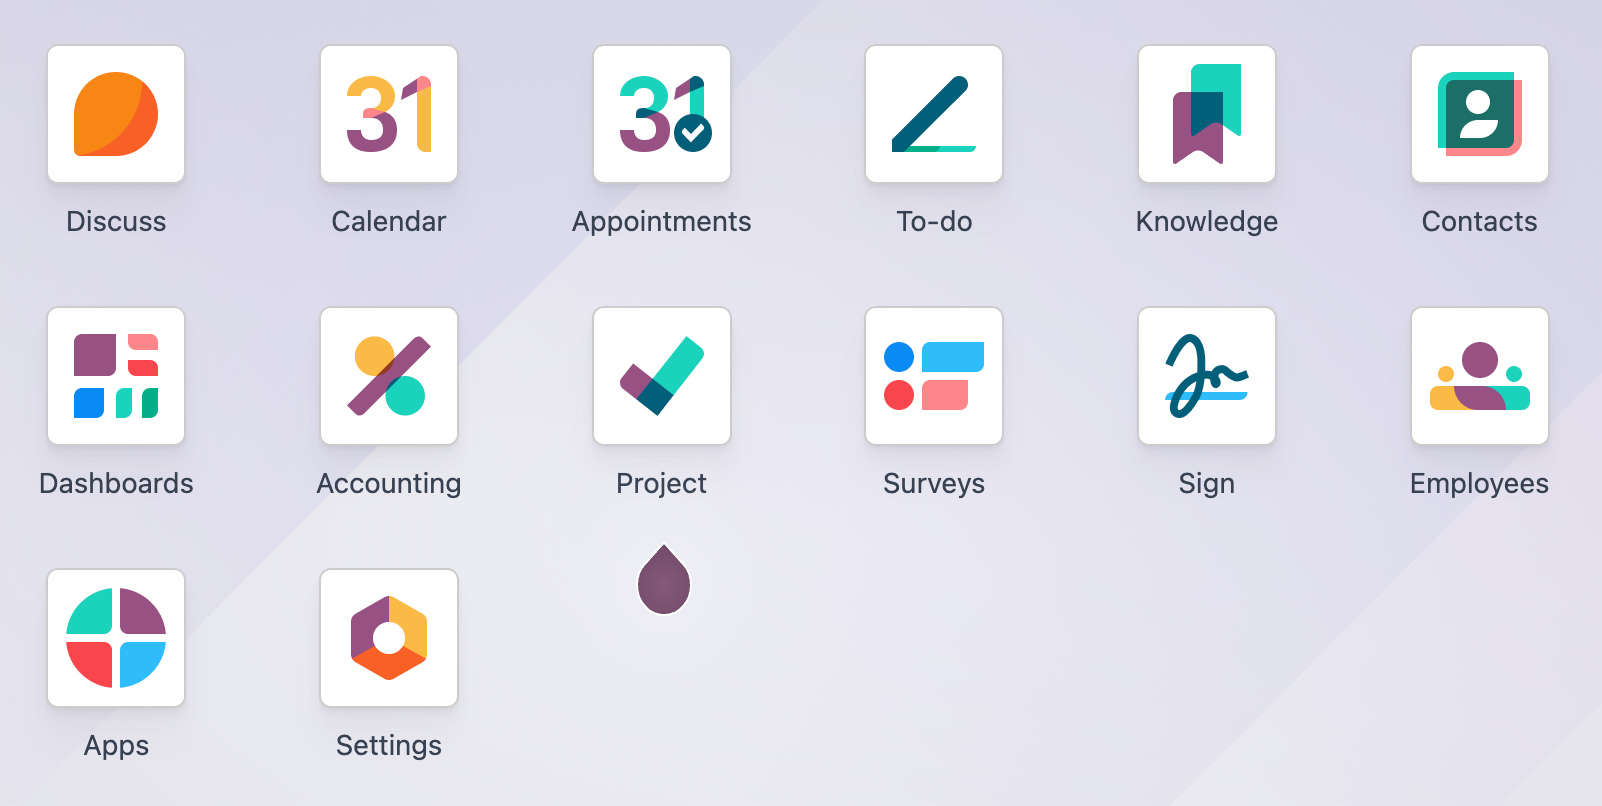
- After installing the applications, they will be displayed in the main menu as modules.
On Odoo: Activating Developer Mode
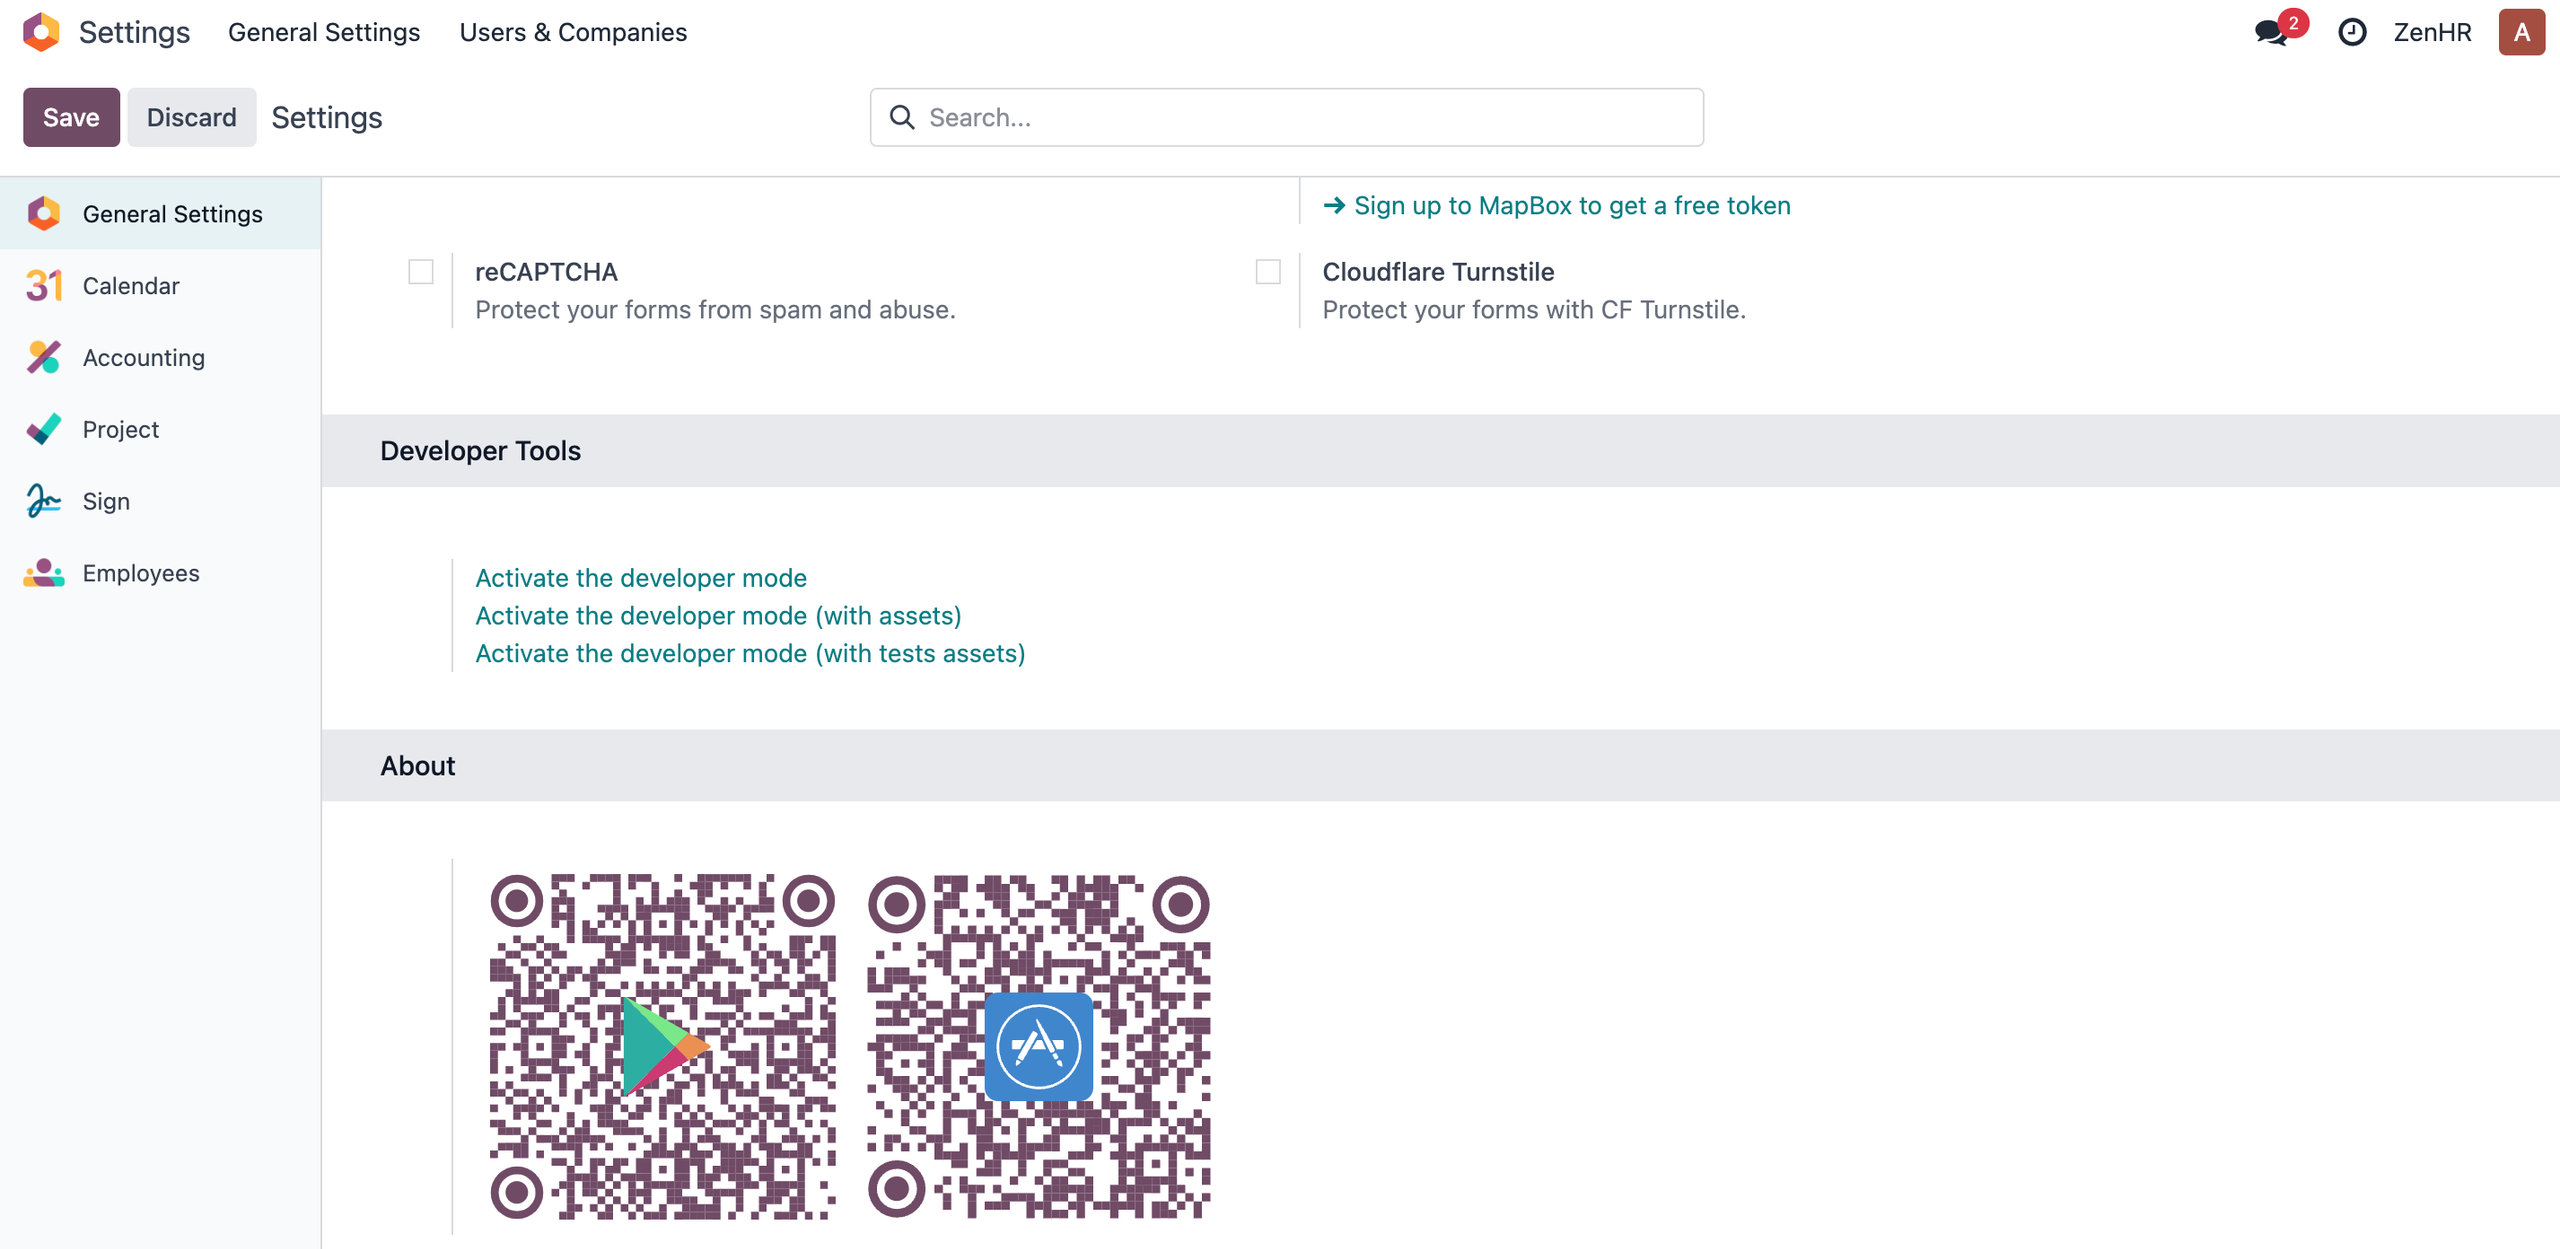
To enable developer mode for utilizing Odoo APIs, navigate to the Settings module and select "Activate the developer mode".
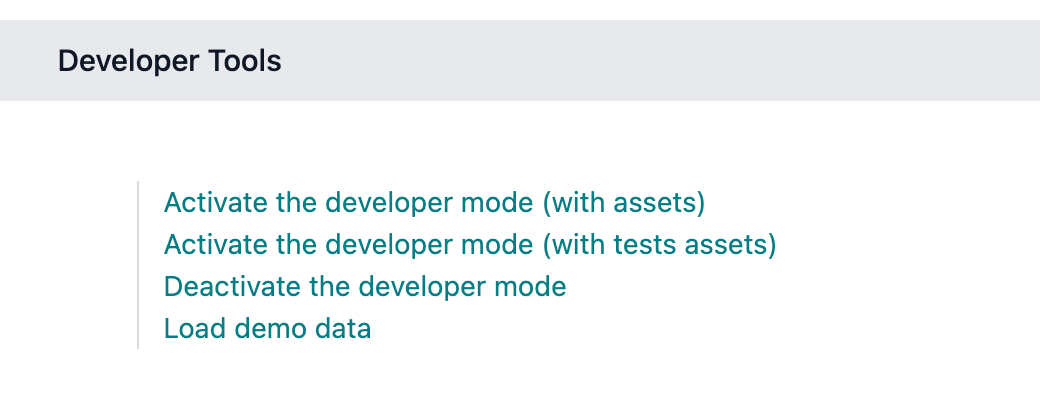
After enabling developer mode, the option Load demo data becomes available, allowing you to populate modules with sample data. Use this feature only in a testing environment—not in the customer’s live Odoo account—as it will overwrite existing data.
On Odoo: Get The Database Identifier
The company database identifier in Odoo is used to connect the company accounts between ZenHR and Odoo.
Note :In Odoo 17, you can find the database identifier on the right side of the screen next to the company name. In earlier versions, it is available in the user menu. (Ensure Developer mode is enabled.)

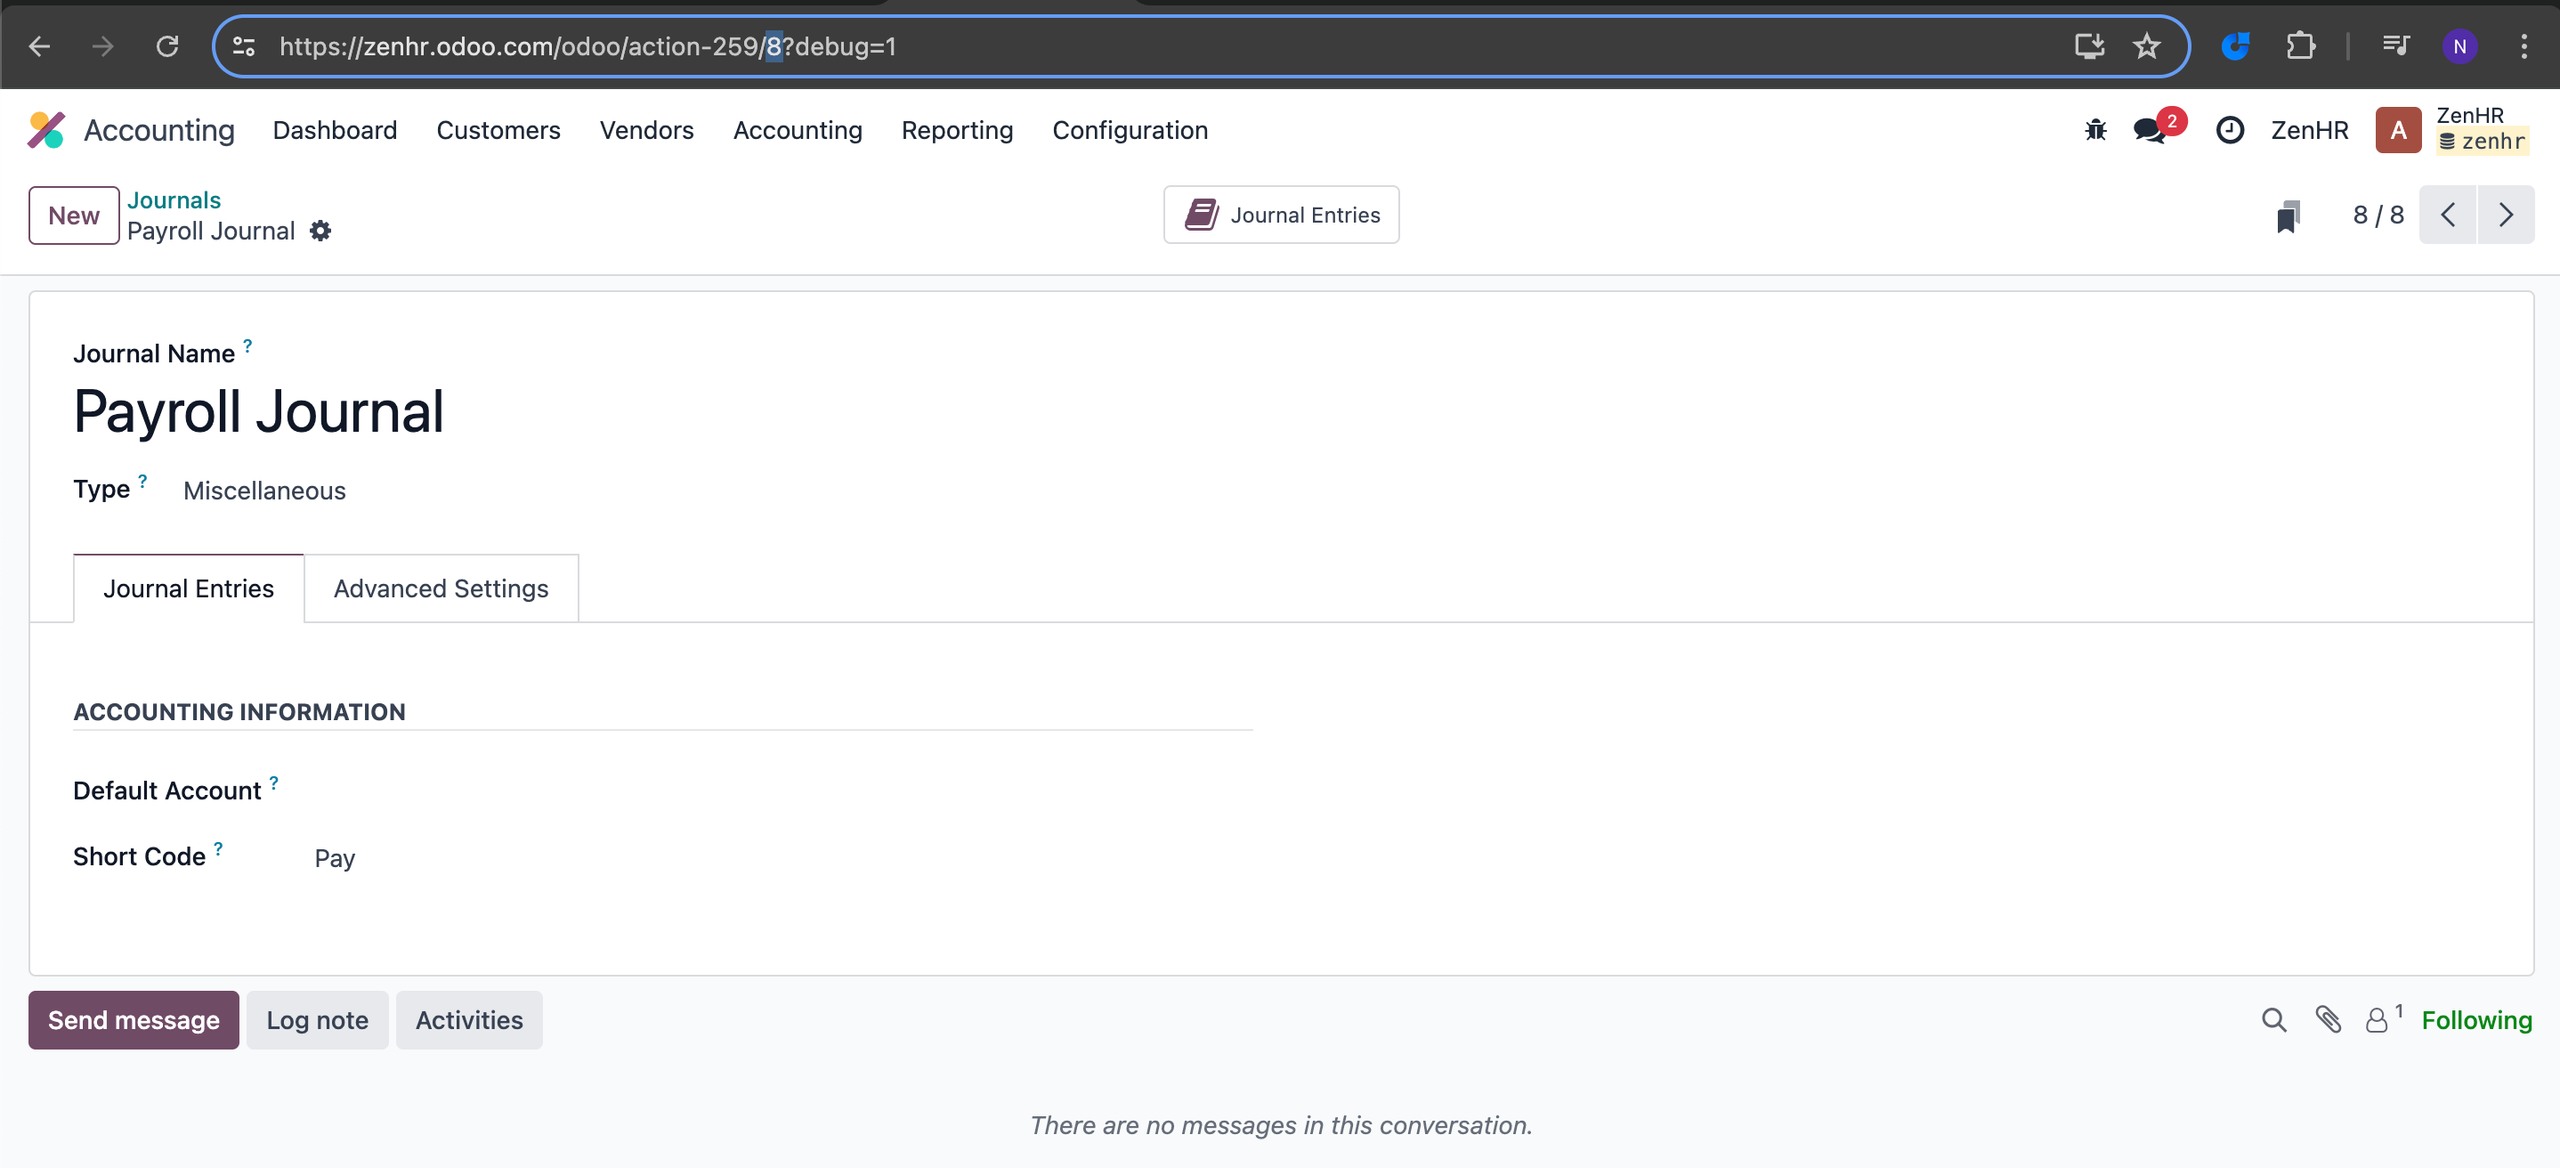
On Odoo: Get the Journal Entry ID
To obtain the journal entry ID, go to Accounting module → Configuration → Journals.
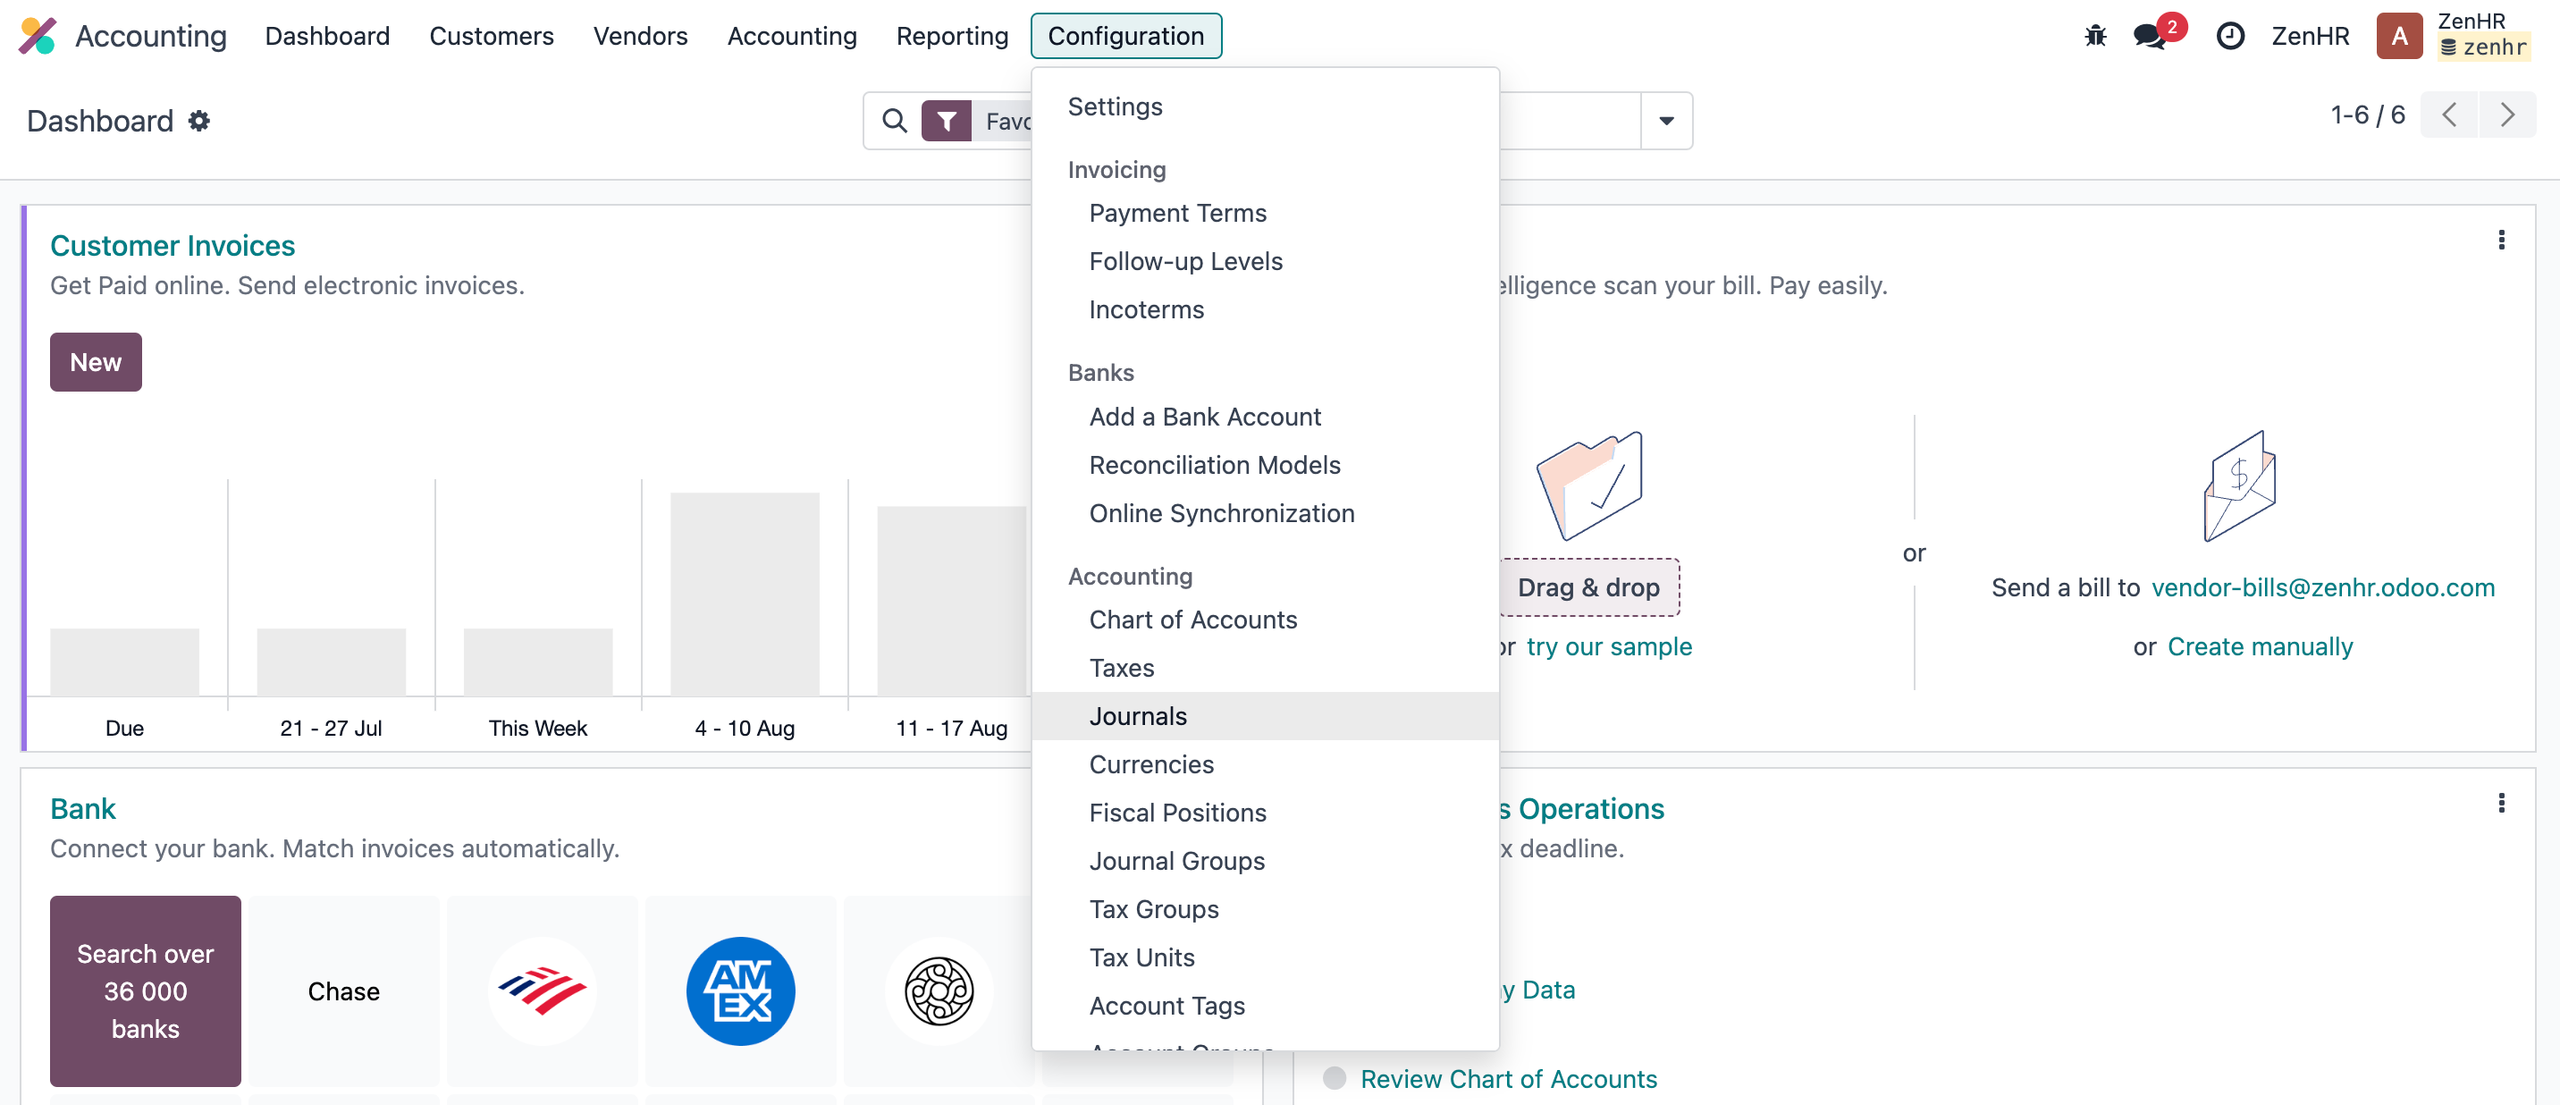
Select the journal that you want to use for the integration, where the journal entries received from ZenHR will be created in this type.
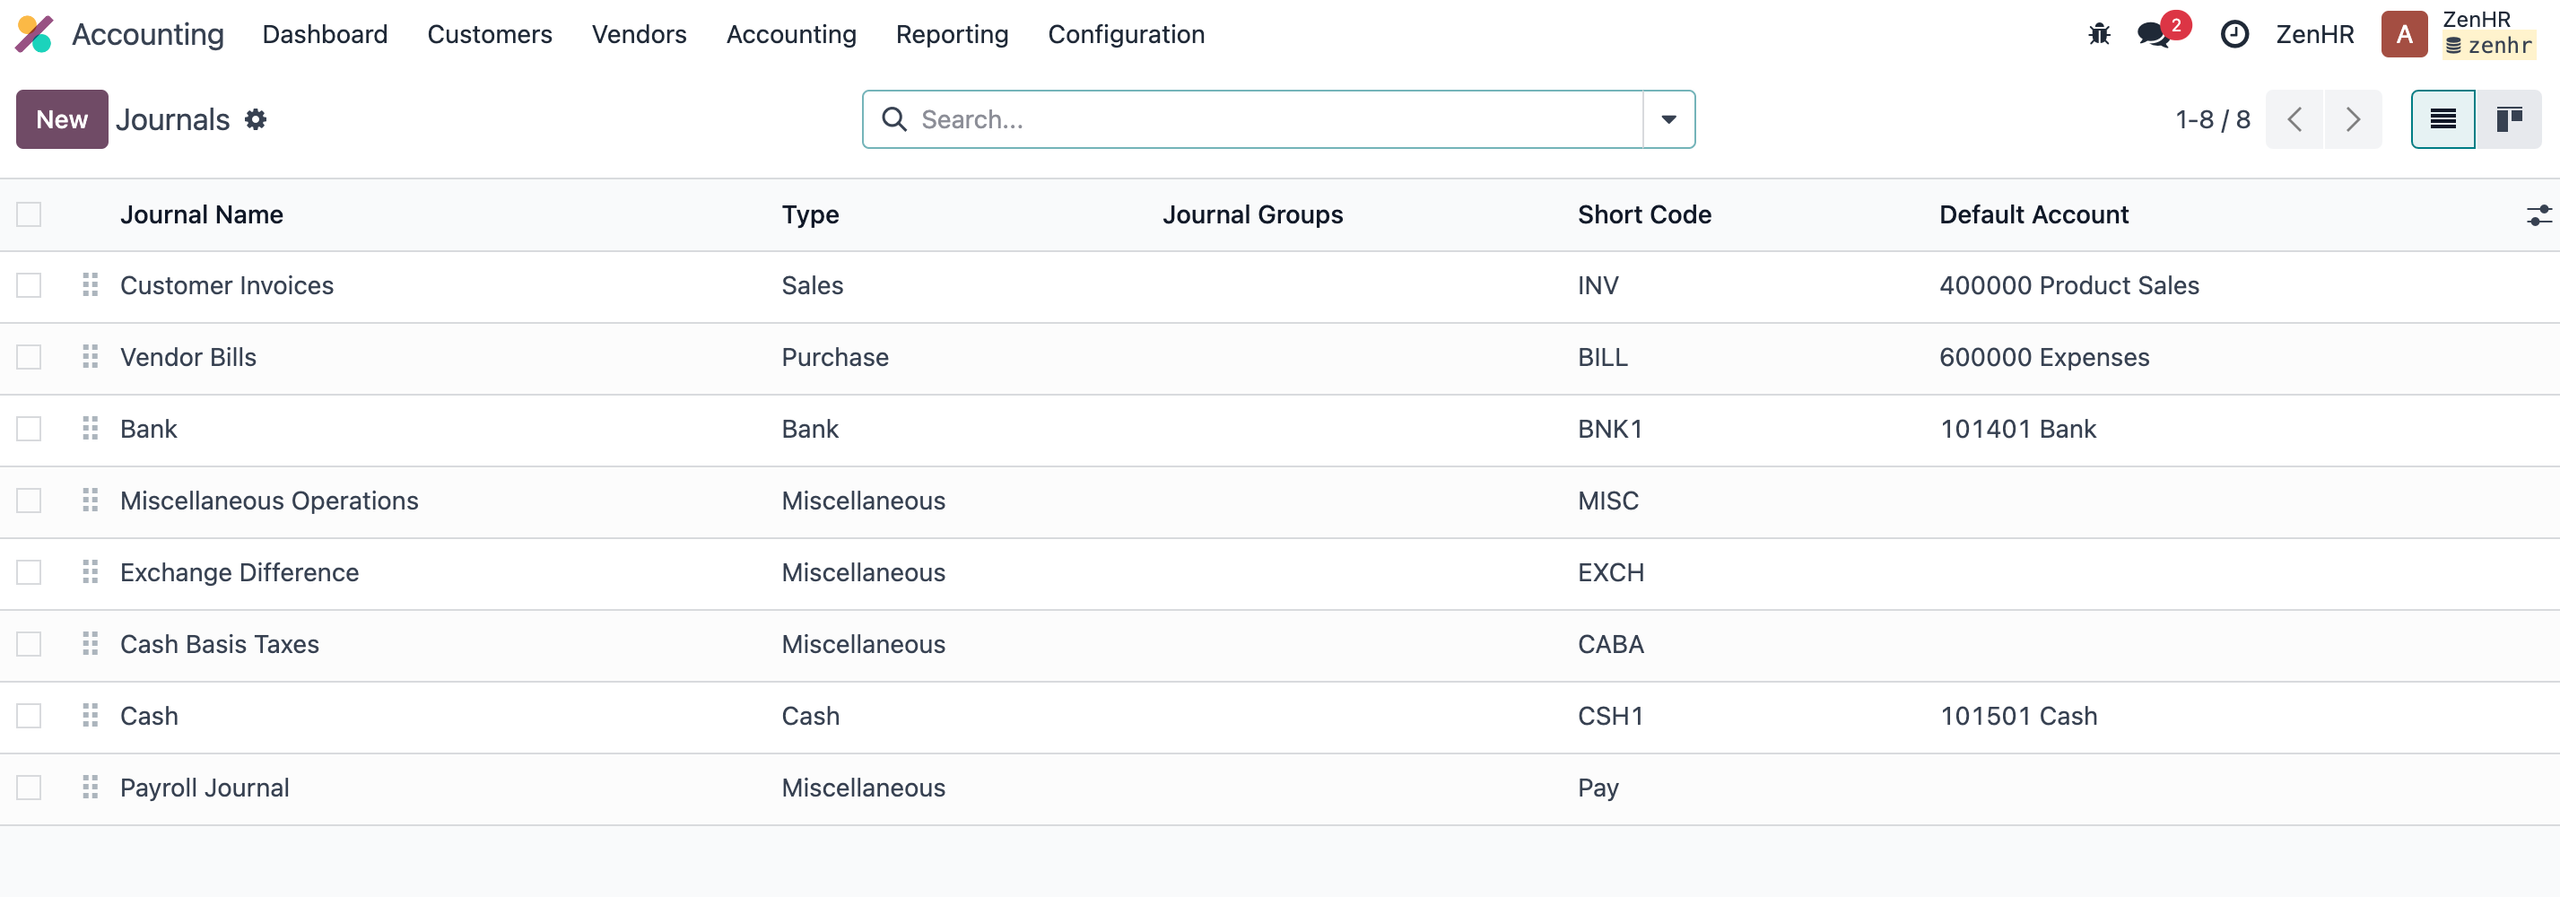
You can locate the ID in the URL as displayed below, or on the right side of the screen next to the pagination element.
On ZenHR: Configure the integration
To enable Odoo’s built-in integration on ZenHR, first create an API key in ZenHR with the authentication type set to Credentials. This API key authorizes Odoo to access ZenHR.
Go to the Marketplace on the main menu or to System Preferences → Integration Setup → Marketplace Integrations → Odoo Setup.
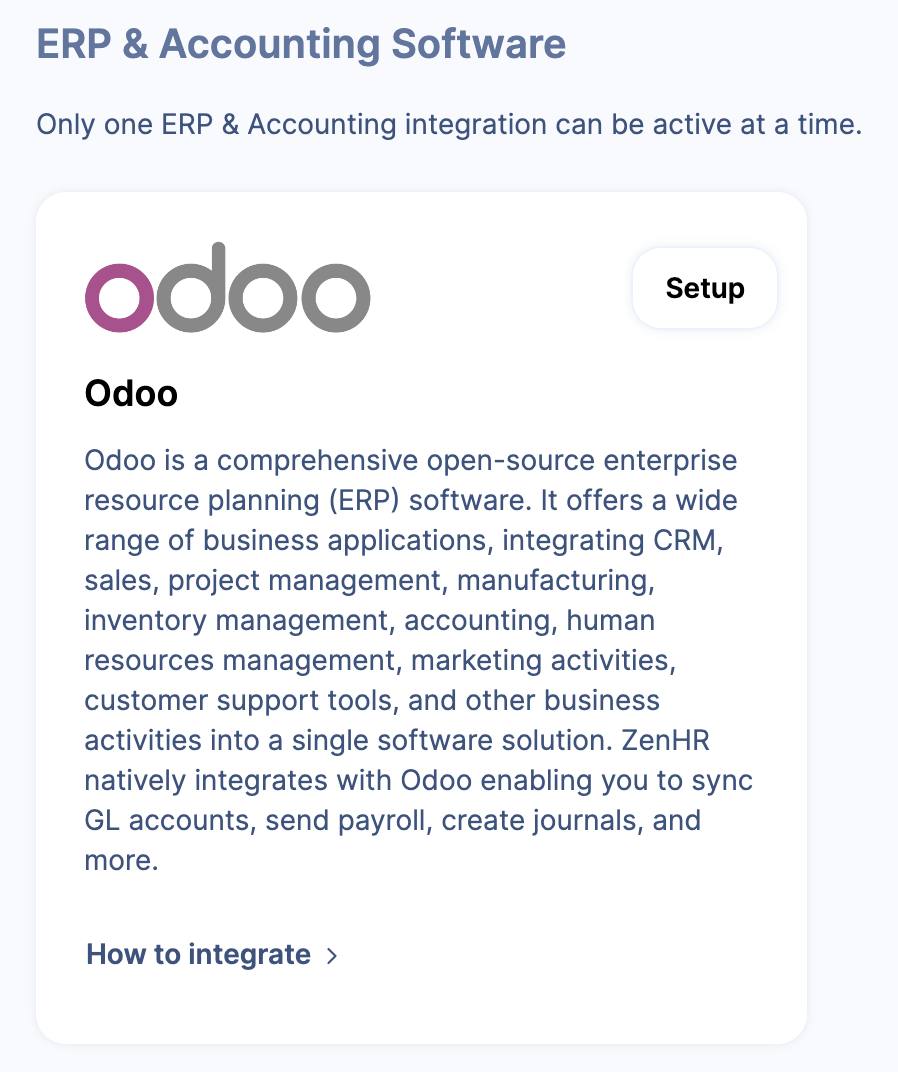
Create a New API Key
click on Add API Key
Add the API key name and choose the authentication type Credentials
Fill in the Username and Password fields with the credentials that you can use to access your Odoo account as an administrator.
Click Create to save the API key.
Enter the URL that you use to access Odoo.
Enter the Odoo company database identifier that we obtained earlier from Odoo.
Enter the Journal ID that you want to use for the integration.
Enable the toggle in the Employee and Journal Entry sections, and click on the Save button.
Use Multi-Company Setup
Enable this option if your Odoo database contains more than one company, such as multiple subsidiaries, legal entities, or branches operating under a single database.
When enabled, ZenHR will include branch information so that journal entries are posted under the **correct company** in Odoo.
How It Works:
- ZenHR sends branch data using the Financial Subsidiary Integration ID.
- Odoo uses this ID to identify the correct company.
- Journal entries are posted under the matching company.
- This ensures accurate company-level accounting and reporting in multi-company environments.
In Odoo: Get the Company Internal ID from Odoo -
- Go to: Settings → Users & Companies → Companies
- Open the target company (subsidiary or branch).
- Locate the Company Internal ID from the browser URL as shown below
In ZenHR:
- Go to: System Preferences -> Branch Setup -> Select the relevant branch -> Click Edit -> Enter the Financial Subsidiary Integration ID ->Save the changes
Note: This value must match the Company Internal ID in Odoo
- Go to to the Odoo integration setup.
-
Enable Use Multi-Company Setup.
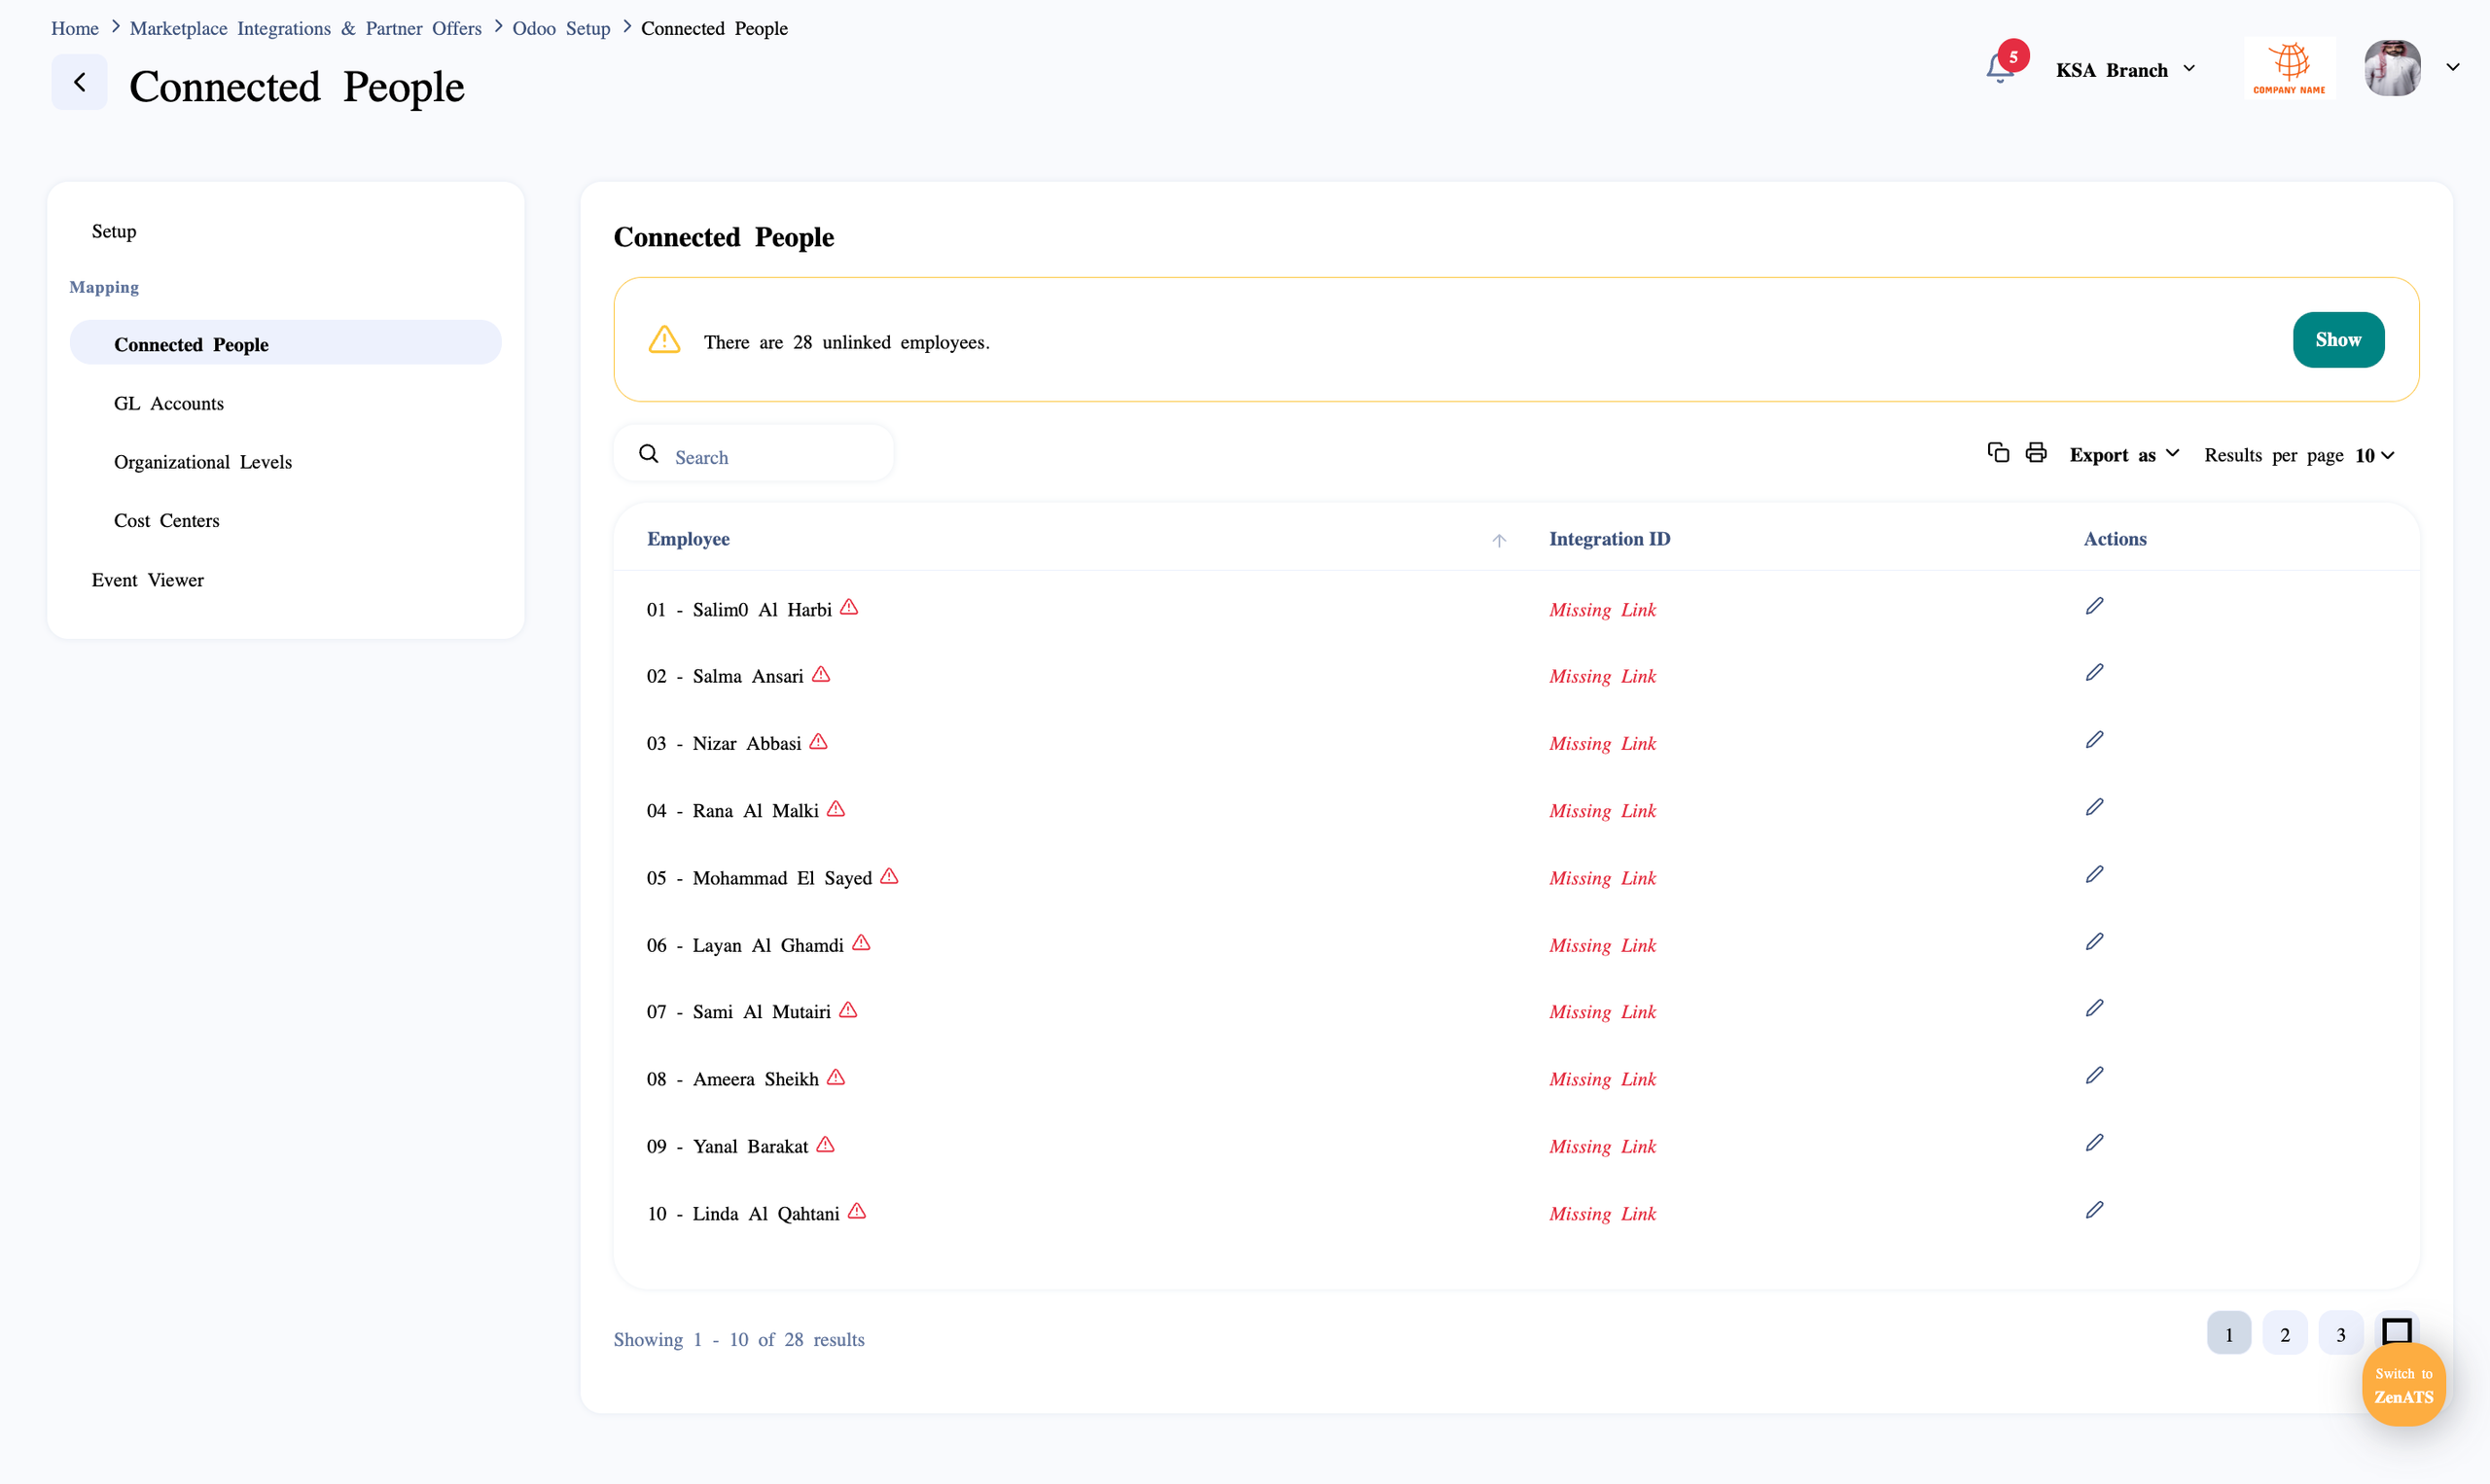
Before activating the employee integration, ensure that the internal ID of each Odoo contact is entered in the Integration ID field within the employee’s personal data on ZenHR. If this field is left blank when updating an employee, a duplicate record may be created in Odoo. To avoid this, go to Odoo Setup on ZenHR → Connected People and complete the required fields. as shown below
In addition Ensure that the integration IDs for organizational levels (such as work locations and departments) are consistent across both ZenHR and Odoo. Go to Odoo Setup → Organizational Levels. as shown below
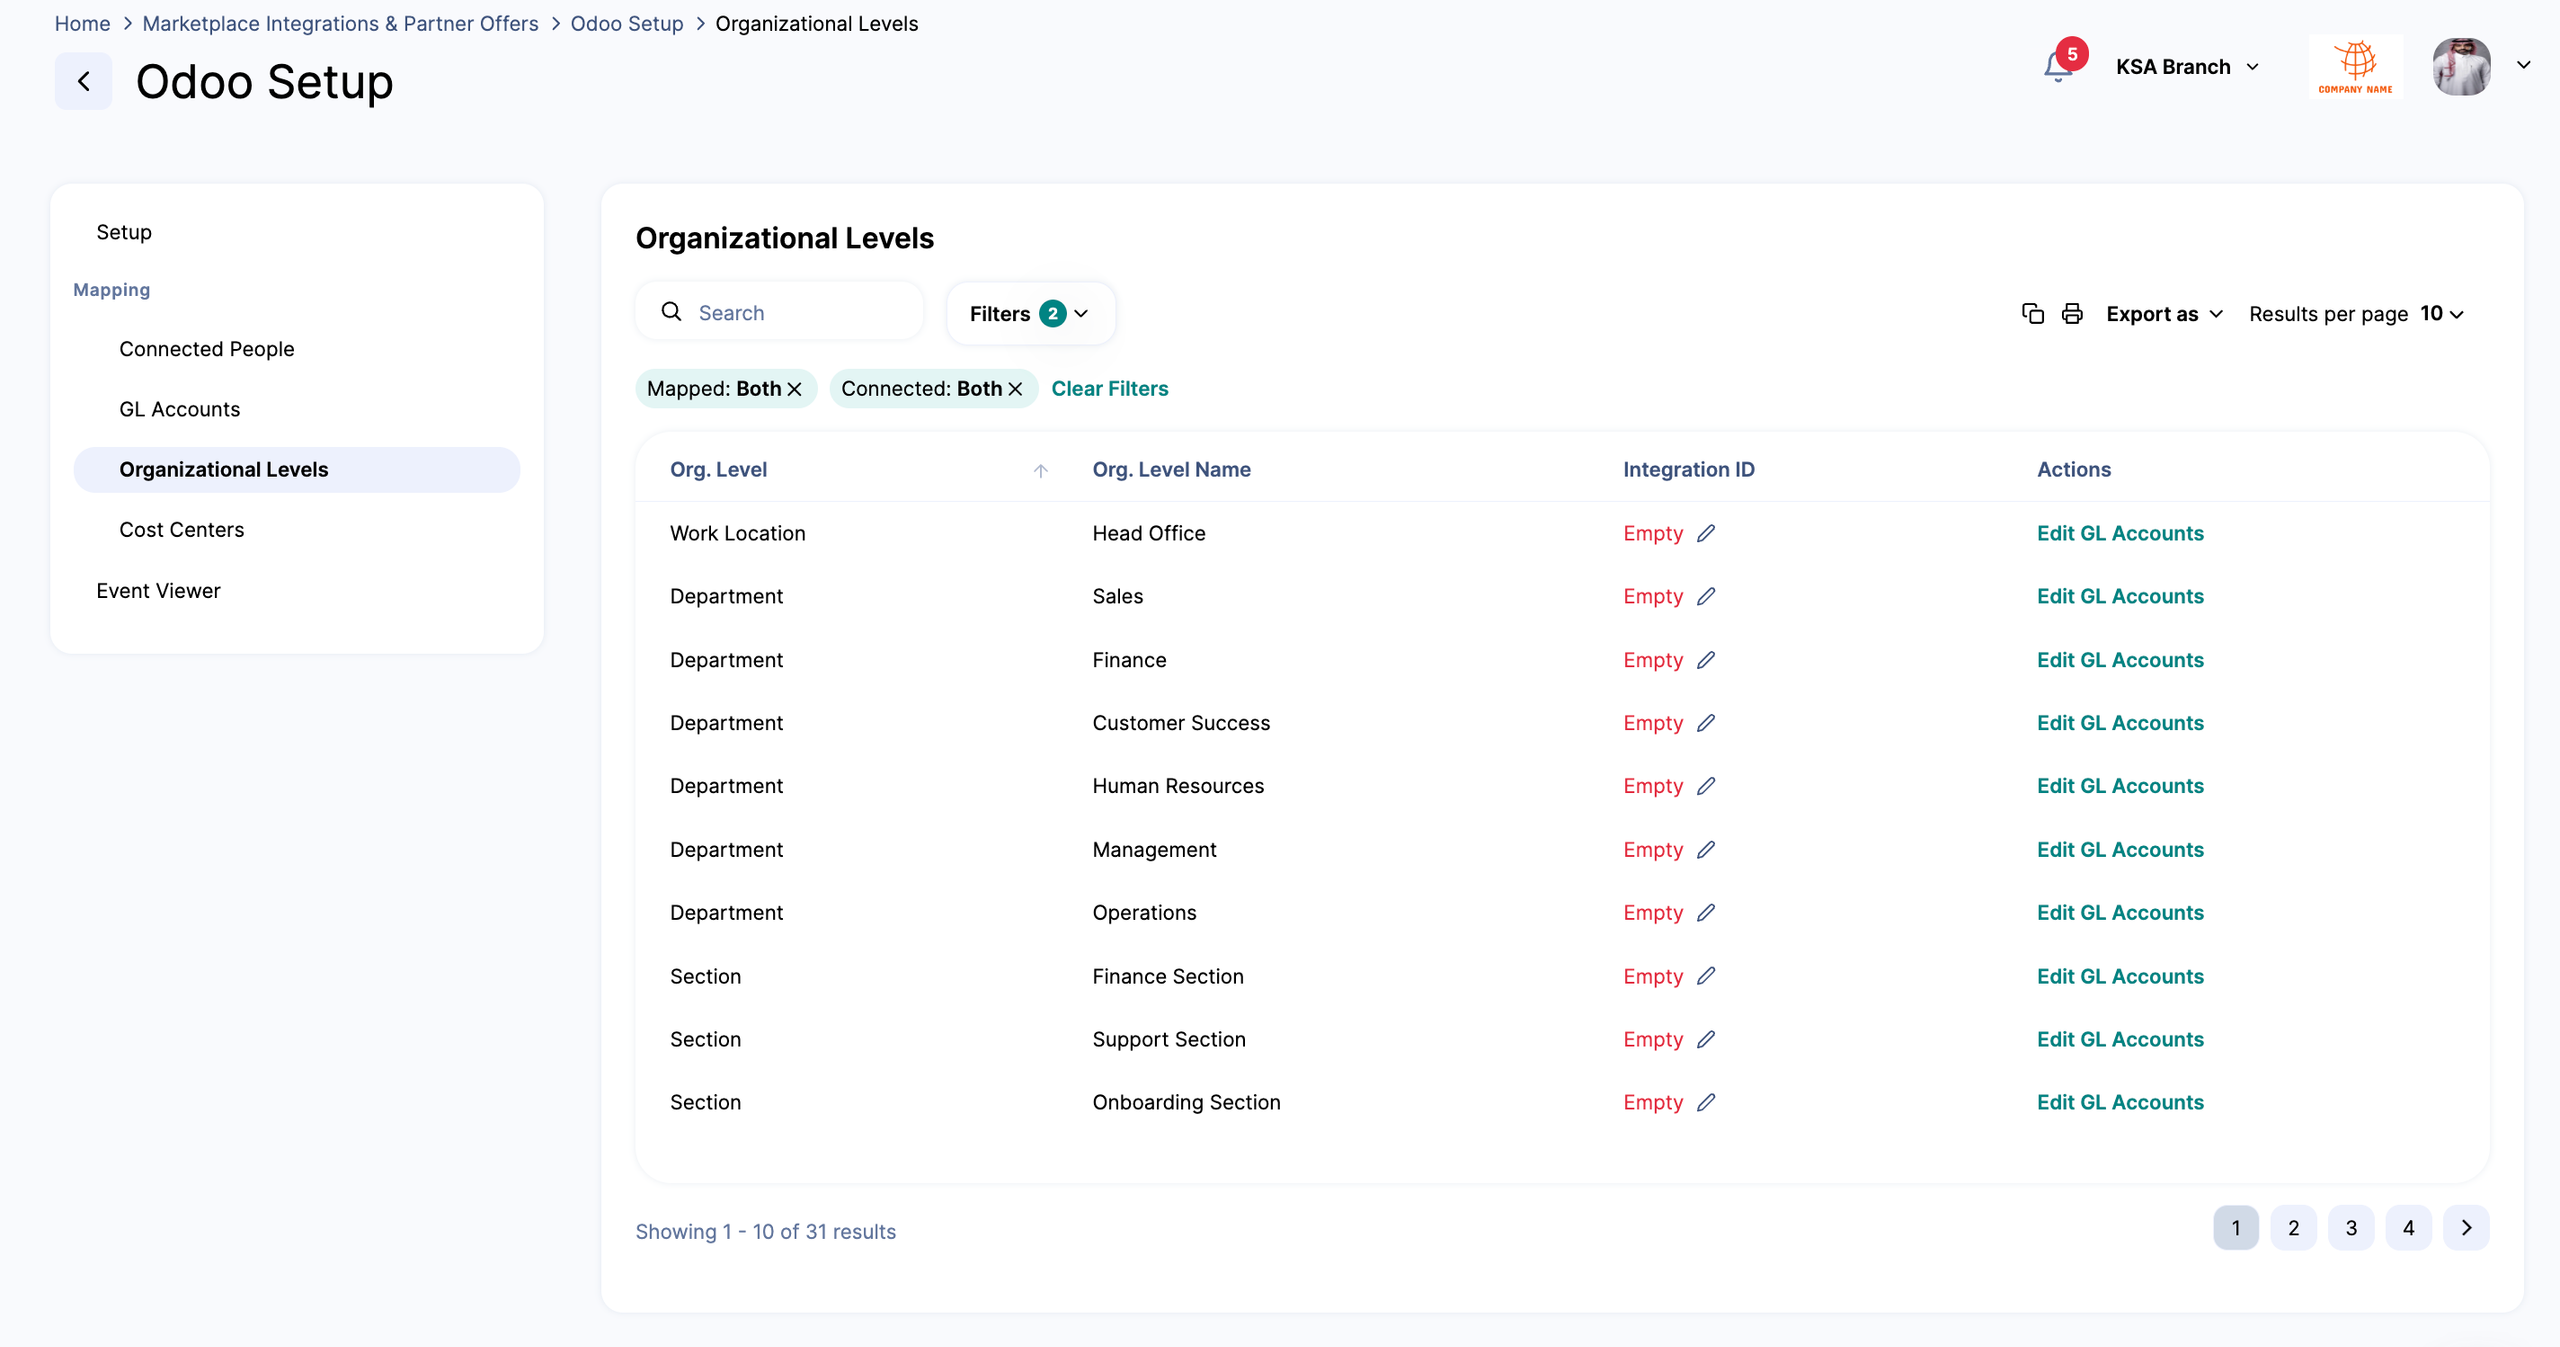
Note: The integration ID is used when you need as the Odoo Analytic ID
Analytic Distribution Level
The Analytic Distribution Level defines how costs and revenues are analytically tracked in Odoo when journal entries are generated through the ZenHR integration.
ZenHR supports analytic distribution at either the Employee level or an Organizational level, depending on the customer’s accounting and reporting requirements.
- Employee Level (Default)
Analytic accounting is applied per employee. Each employee’s transactions are posted against their corresponding Partner ID in Odoo.
This option is recommended for organizations that require Detailed employee-level cost tracking (Detailed Journal) - Organizational Level
When Organizational Level is selected, analytic accounting is applied based on a chosen organizational structure (such as Department, Work Location,etc.).
The Integration ID (Odoo Internal ID) of the selected organizational level in ZenHR is used to map and apply the corresponding Analytic Account in Odoo.
Journal entries are posted according to the selected organizational level
This option is recommended for organizations that prefer aggregated reporting (Summary Journal) and cost tracking at an organizational level rather than per employee. Note: The Org level internal id must be added in the Organizational Level page as shown below
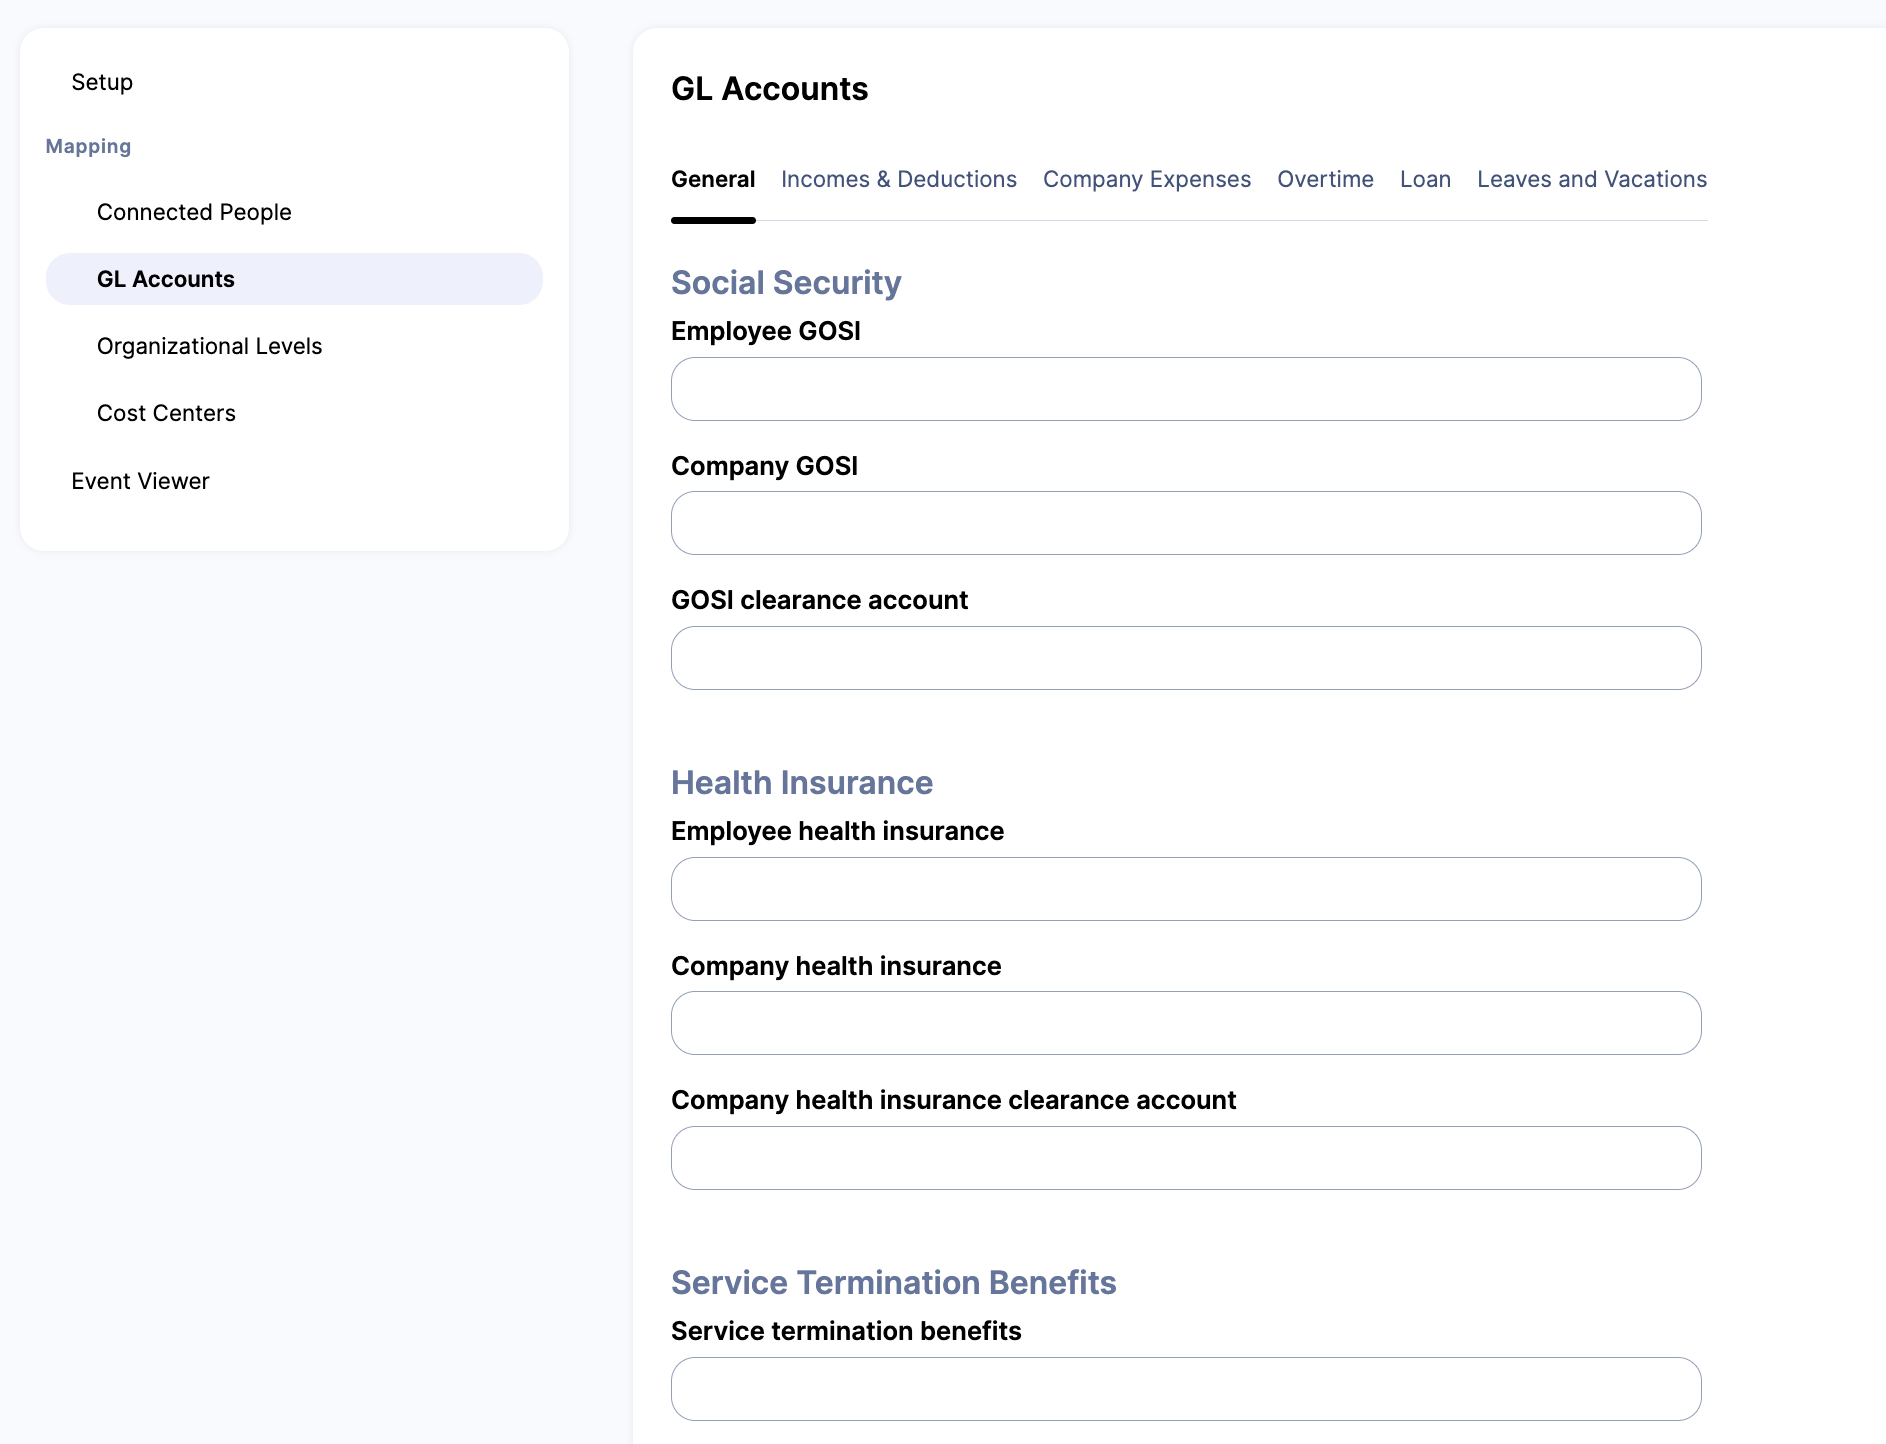
Go to the GL Account tab to view the fields that must be completed. After successful integration, dropdown lists will appear in these fields, reflecting your Odoo Chart of Accounts. For more details, refer to the article “GL Accounts Explanation.” Be sure to review all tabs (such as Income & Deductions, Loans, etc.). as shown below
How to Use Odoo Integration
After successfully integrating Odoo with your ZenHR account, you can map GL accounts, create and update employee records in ZenHR, and transfer journal entries—including salaries, off-cycle transactions, employee settlements, company contributions, expenses, and provisions—from ZenHR to Odoo.
Map Odoo GL Identifiers with ZenHR Financial Transactions :
After enabling the Odoo integration, the chart of accounts is retrieved via APIs. Consequently, GL accounts appear in the GL Accounts fields across all financial transaction pages and the payroll setup page in ZenHR.
Add and Map GL Accounts
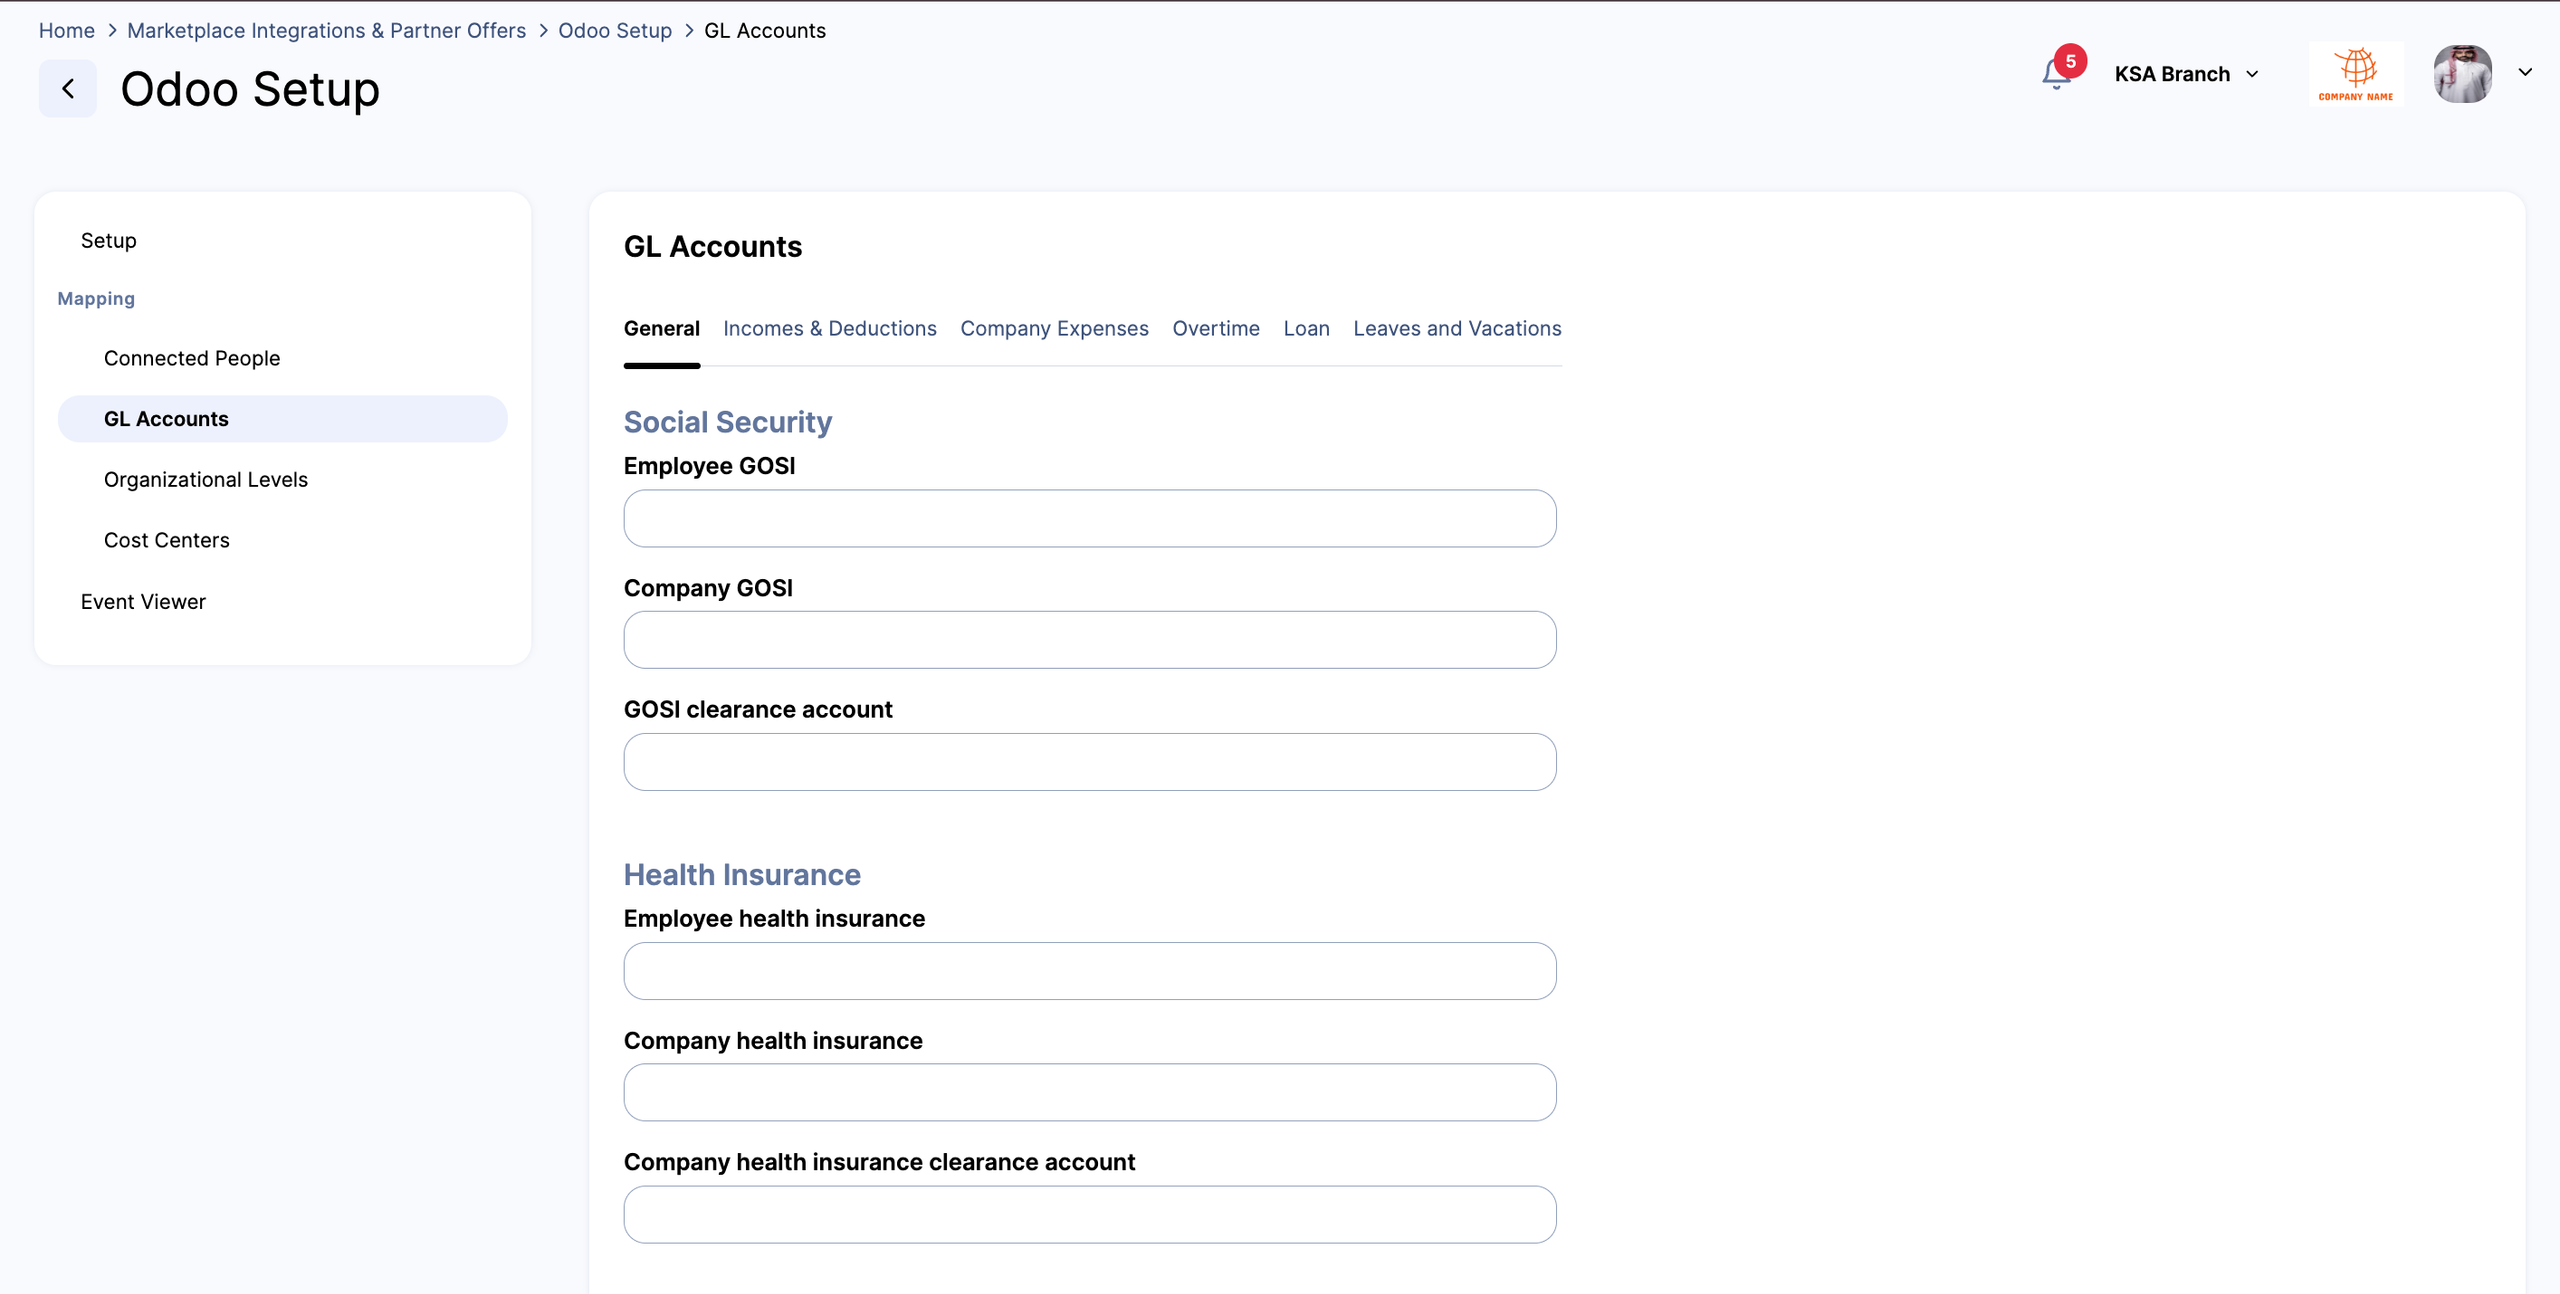
On ZenHR, click your user icon in the upper right corner and go to System Preferences → Marketplace Integrations → Odoo Setup → GL Accounts.
From the dropdown list, select the appropriate GL account for each salary transaction type. he list reflects the GL accounts in your Odoo account.
Then click “Update” to save your changes
Add Financial Transactions GL Accounts
Go to the Incomes & Deductions tab on the same page as above.
Open the Financial Transaction Type by selecting “✎” icon on the Transaction Type entry.
Choose the GL Account Number and Clearance account Or Enter them Manually.
Finally, press on the “✔” icon.
Add Loans GL Accounts
Go to Loans Tab in the same page above.
Open the loan type by selecting “✎” icon on the corresponding record.
Choose the GL Identifier and the Clearance account.
Finally, press on the “✔” icon.
Add Overtime GL Accounts
Open the Overtime Type by selecting “✎” icon on the corresponding record.
Choose the GL Identifier and Clearance account.
-
Finally, press on the “✔” icon.
Add Leaves and Vacations GL account
Open the Leaves and Vacations Type by selecting “✎” icon on the corresponding record.
Select the GL Identifier and Clearance Account.
Finally, press on the “✔” icon.
Posting Journal Entries
After activating the integration, you can transfer journal entries—including salaries, off-cycle transactions, employee settlements, company contributions, expenses, and provisions—from ZenHR to Odoo.
Set Up Journal Entries Structure
Before sending journal entries from ZenHR to Odoo, configure the journal entry structure. This allows you to define which entries are transferred, whether they are detailed by employee or summarized by a specific cost center, and whether they are sent automatically or manually.
To configure this:
In ZenHR, go to System Preferences → Integration Setup → Journal Entries Structure.
-
Configure the required fields based on your preferred journal entry structure, then select Save.
Note: For better understanding of this section please refer to "Journal Entries Structure" article
Post salaries from ZenHR to Odoo
On the left side of the page, go to Main Menu → Payroll → Manage Salaries.
Filter the desired salary year and month for all employees, and click “Filter”.
Then click “Send to Odoo”, and your salaries will be transferred as journals.
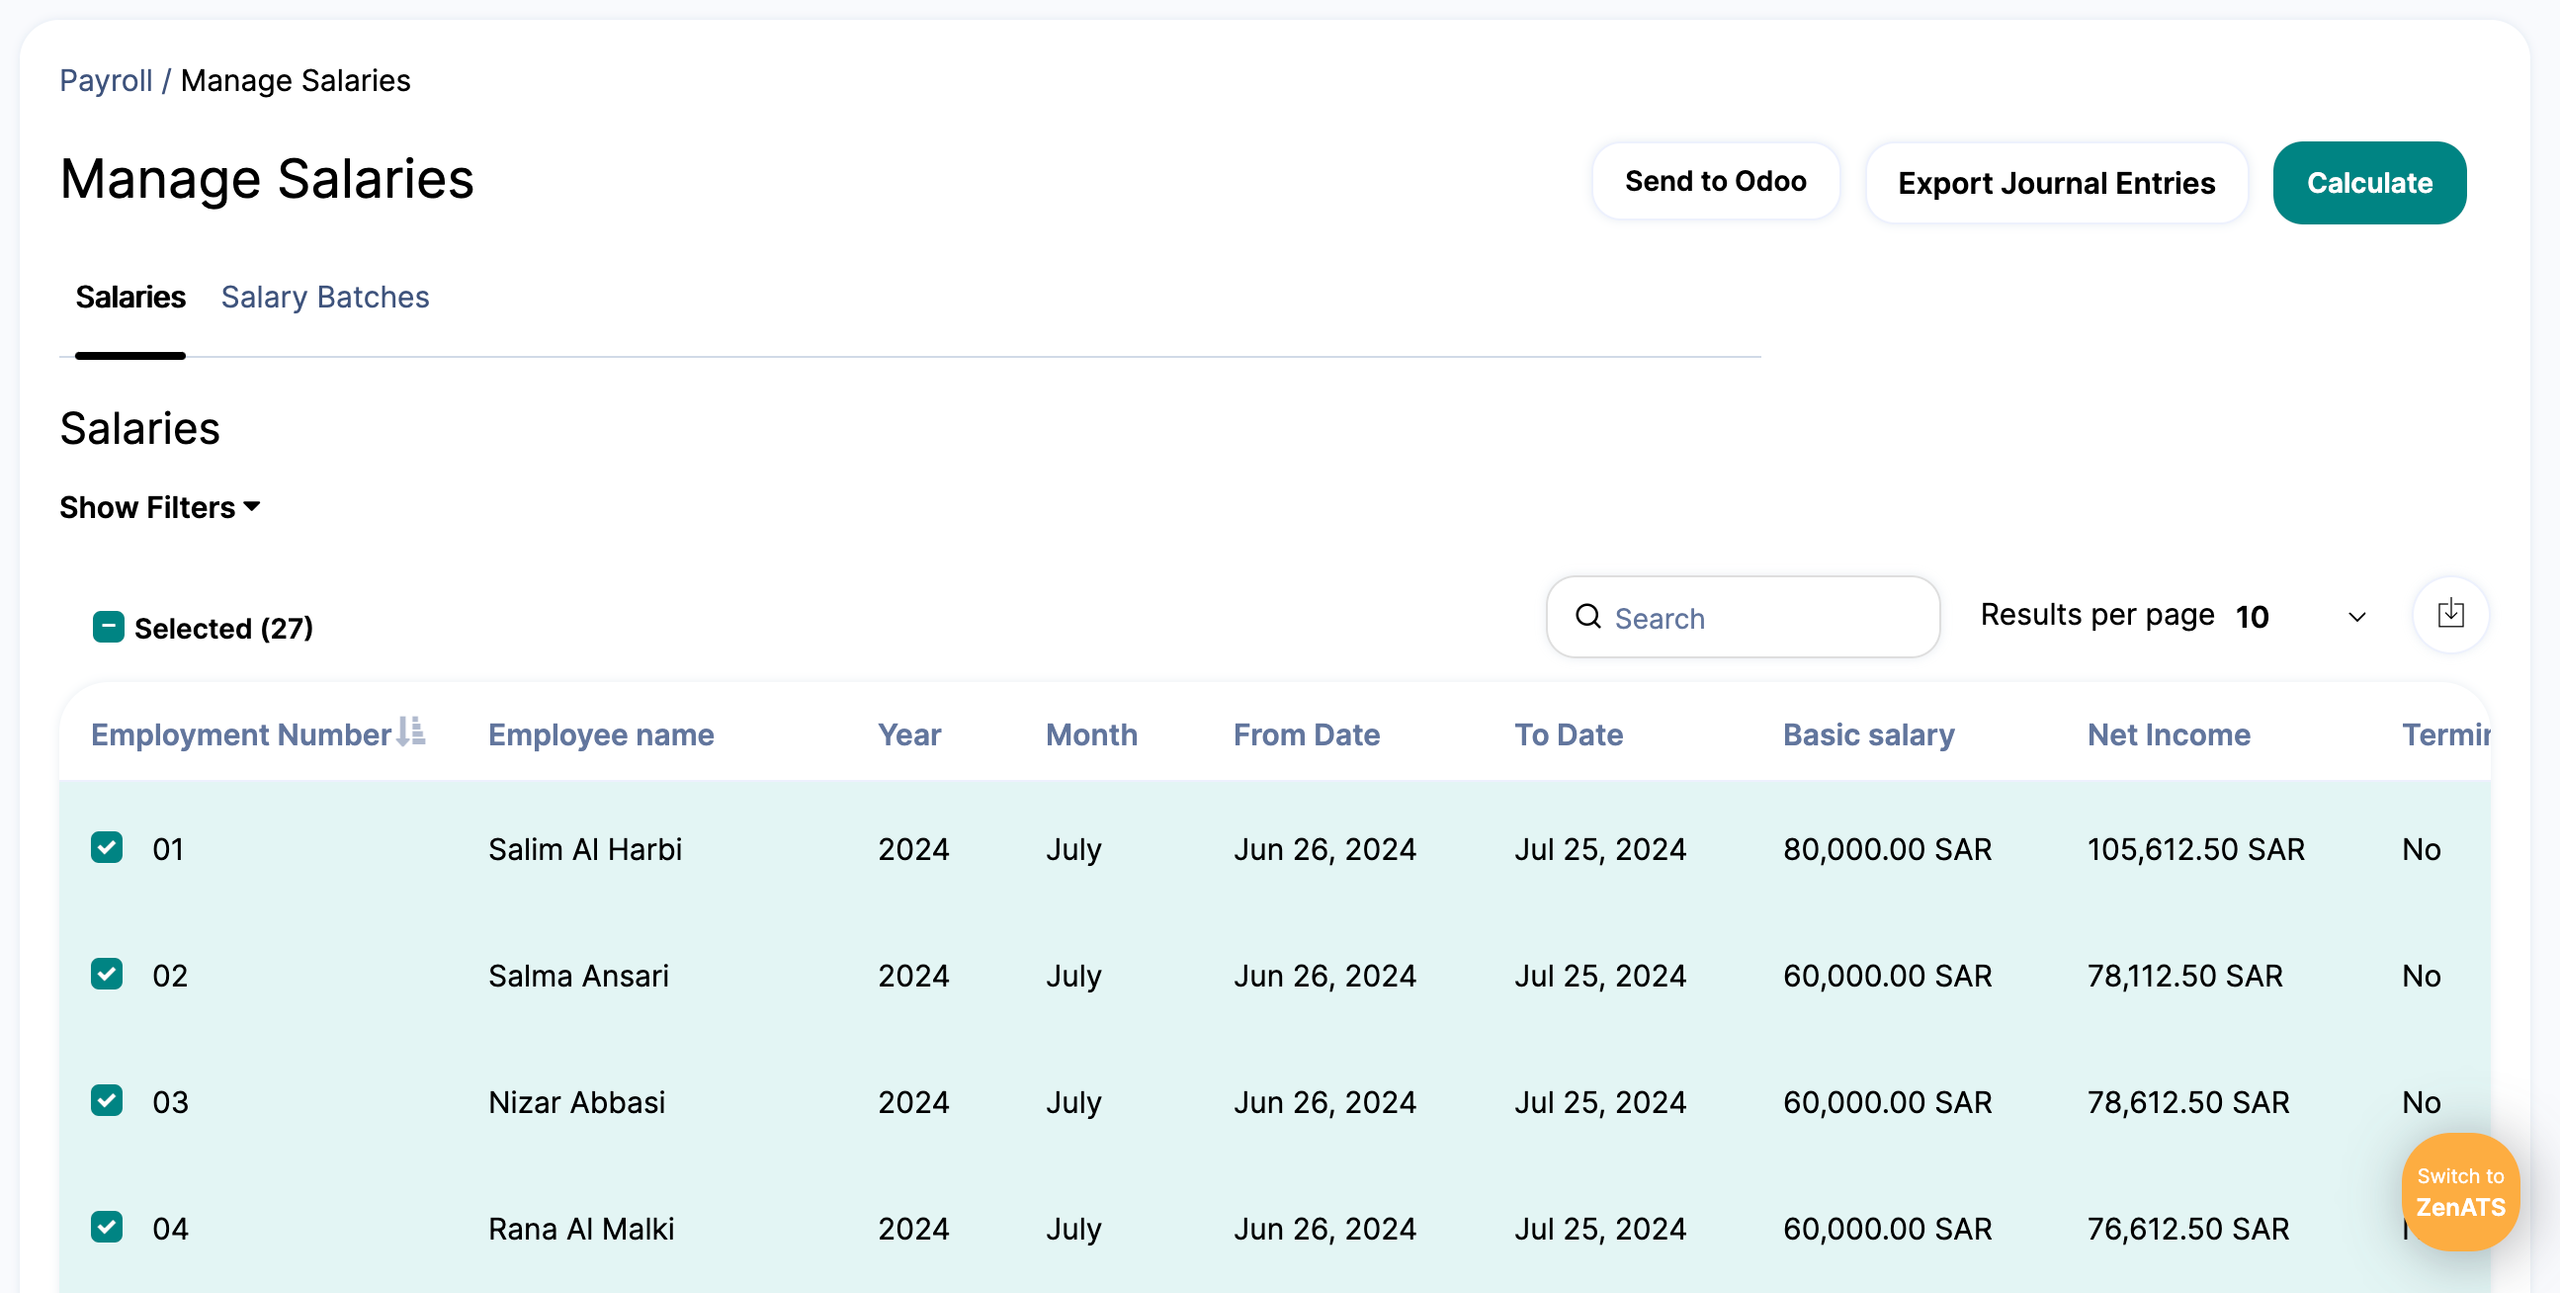
Note: You must filter the “Date from” and “to” filters for the "Send to Odoo" button to appear.
Post Off-Cycle Payments From ZenHR to Odoo
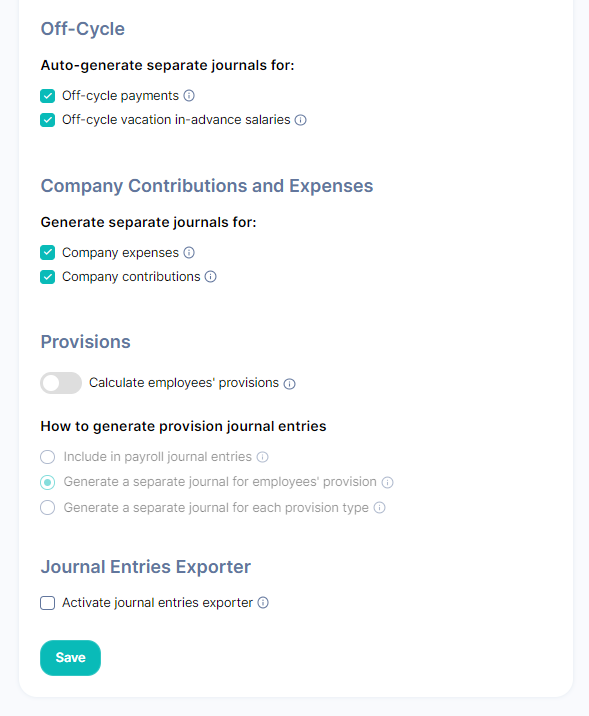
To auto-generate separate journals for off-cycle payments and post them with your payroll journal entries, follow these steps:
Select your user icon in the upper right corner and go to System Preferences → Integration Setup → Journal Entries Structure.
Enable the Auto-generate separate journals for off-cycle payments checkbox and click “Save”.
-
You can then post salaries from ZenHR to Odoo, and the transferred journals will include separate journal entries for your off-cycle payments.
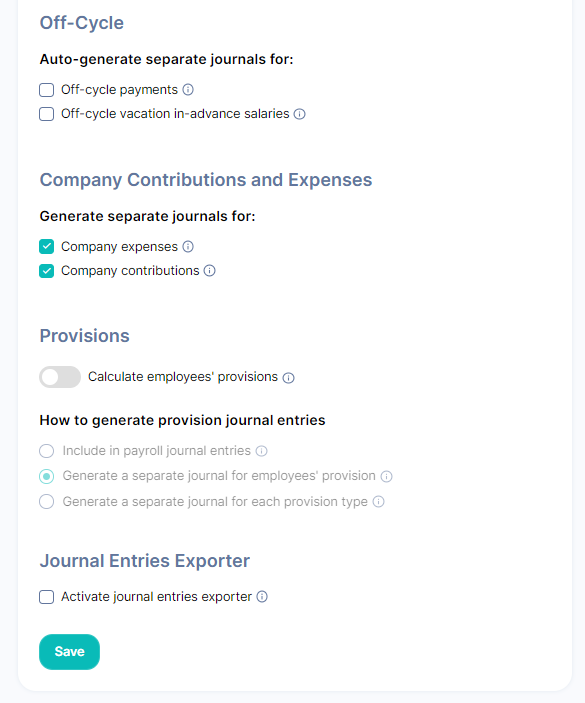
To manually generate off-cycle payments journal entries, follow these steps:
Clear the Auto-generate separate journals for off-cycle payments checkbox and click “Save”.
Go to Main Menu → Payroll → Manage Financials → Manage Financial Transactions → Off-Cycle Payments
Use the “Date from” and “to” filters to select the transaction period, then apply “Filter”.
In the Employee ID column, select the transactions to include in the journal entries.
Then click “Send to Odoo” to transfer the off-cycle payments as journal entries.
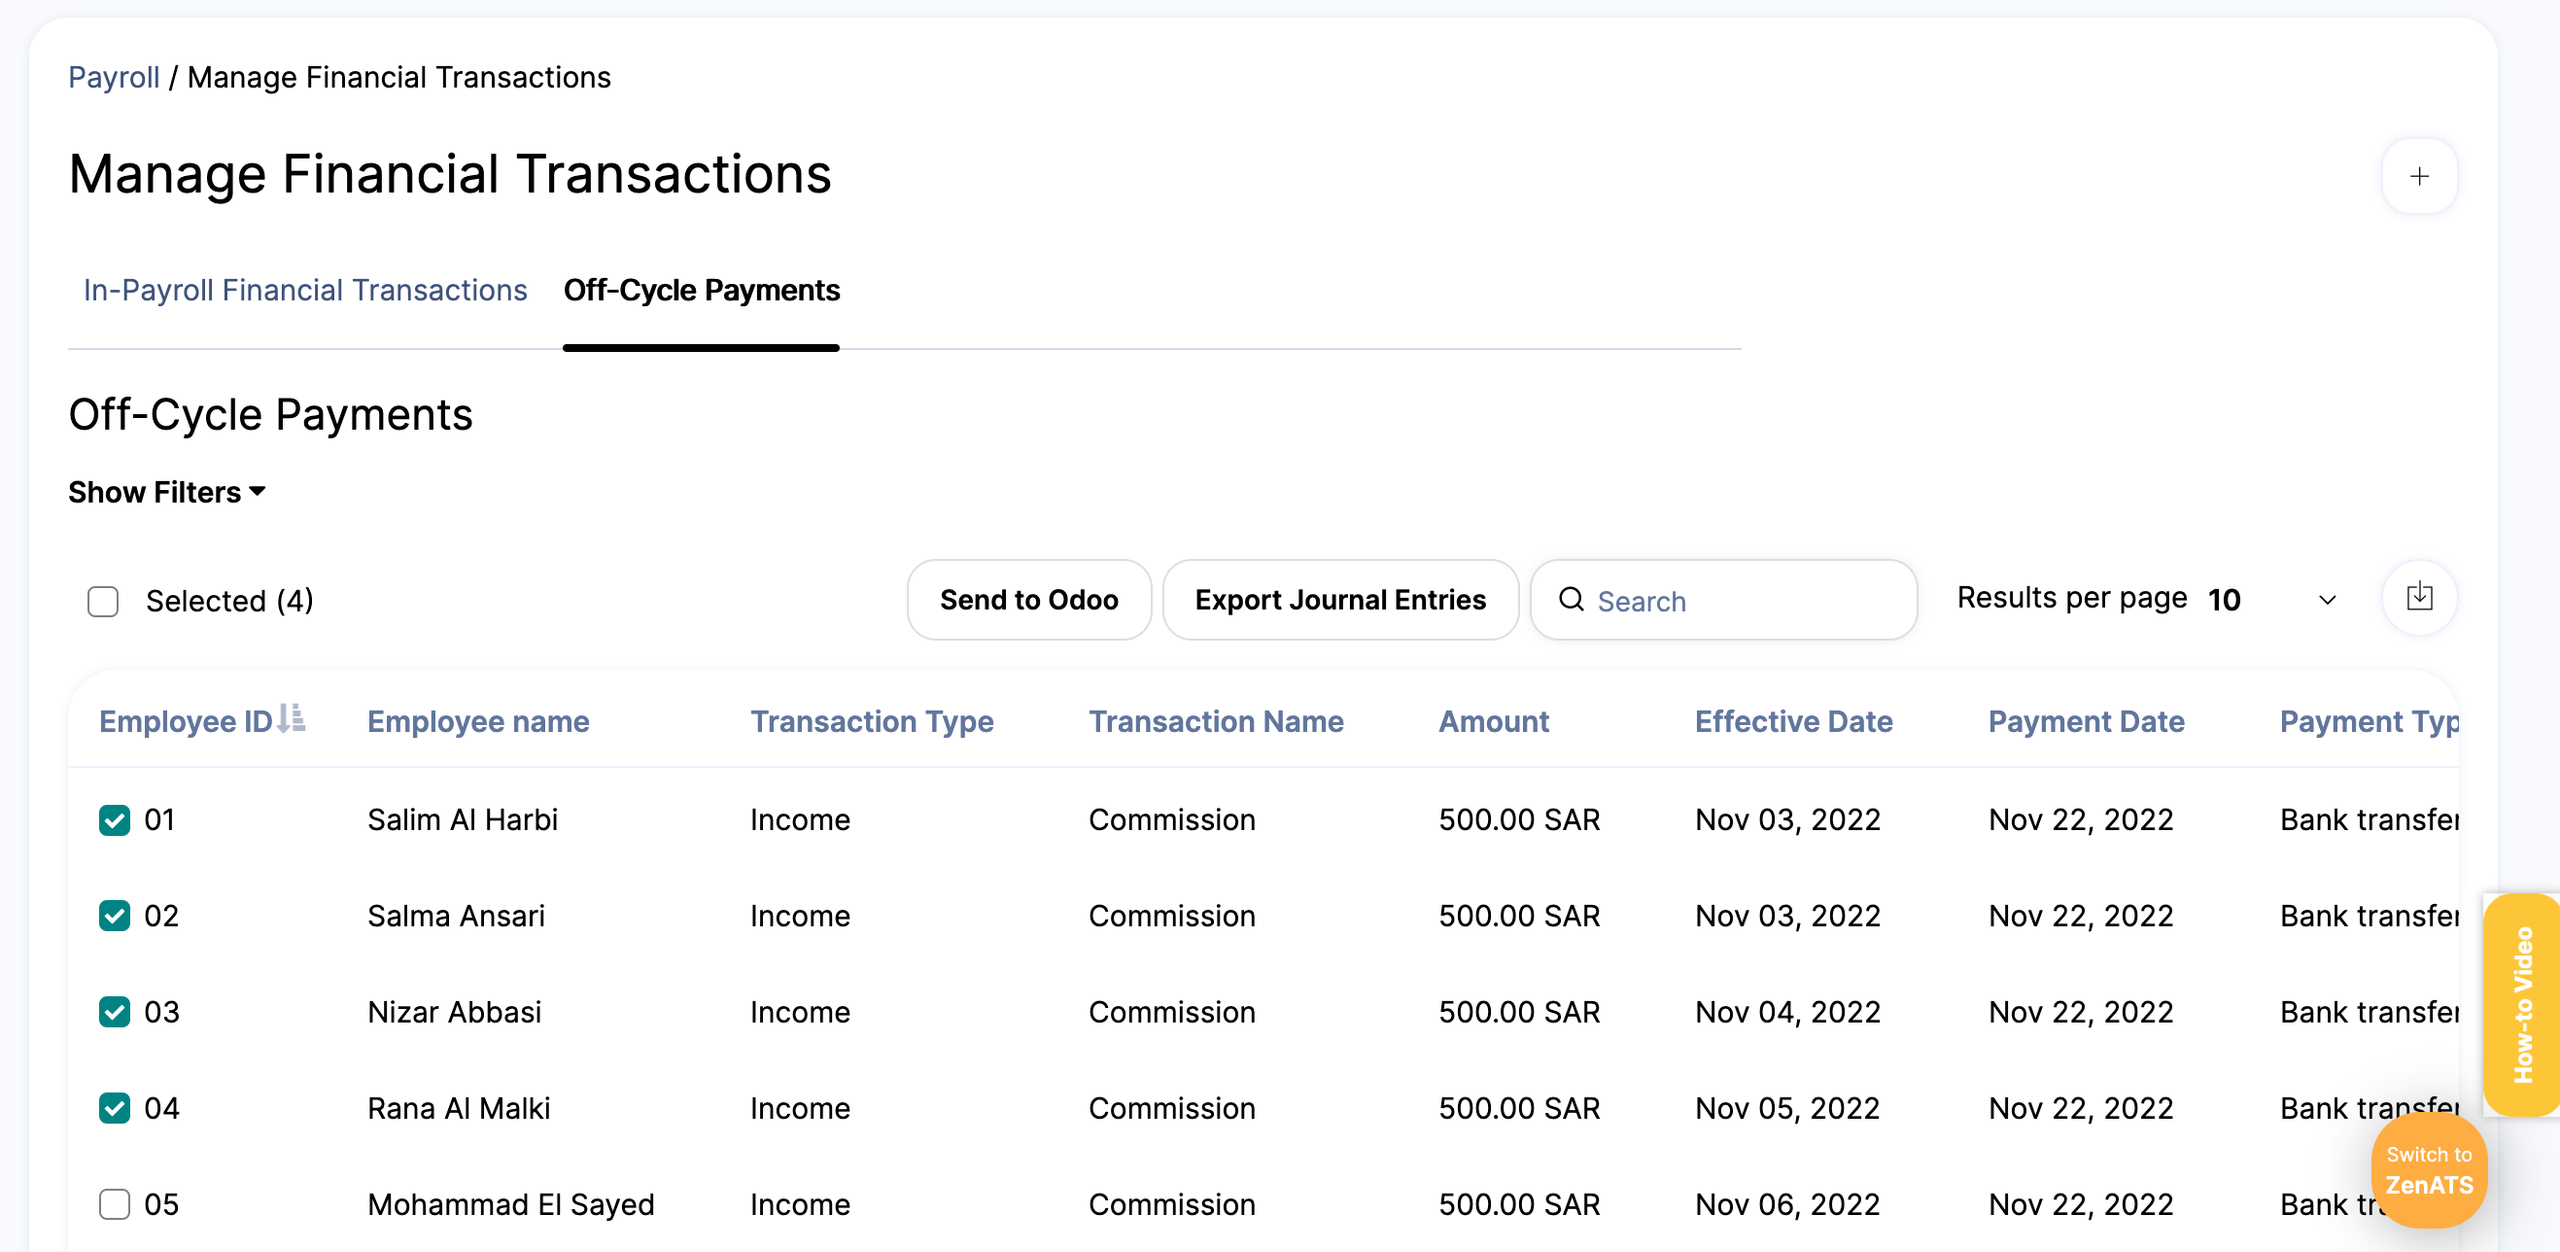
Note: You must filter the “Date from” and “to” filters for the "Send to Odoo" button to appear.
Post Off-Cycle Vacation In-Advance Salaries From ZenHR to Odoo
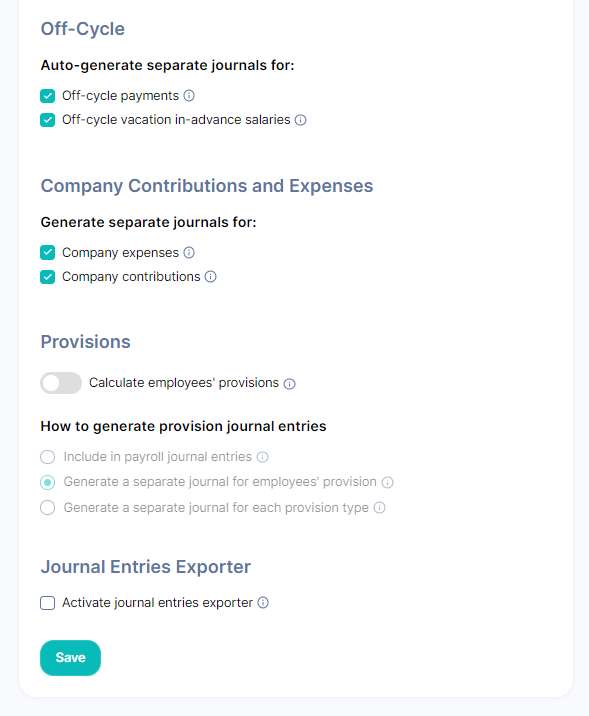
To auto-generate separate journals for off-cycle vacation in-advance salaries and post them with your payroll journal entries, follow these steps:
Click your user icon in the upper right corner and go to System Preferences → Integration Setup → Journal Entries Structure
Enable Auto-generate separate journals for off-cycle vacation in-advance salaries checkbox and click “Save”.
-
You can then post salaries from ZenHR to Odoo, and the transferred journals will include separate journal entries for your off-cycle vacation in-advance salaries.
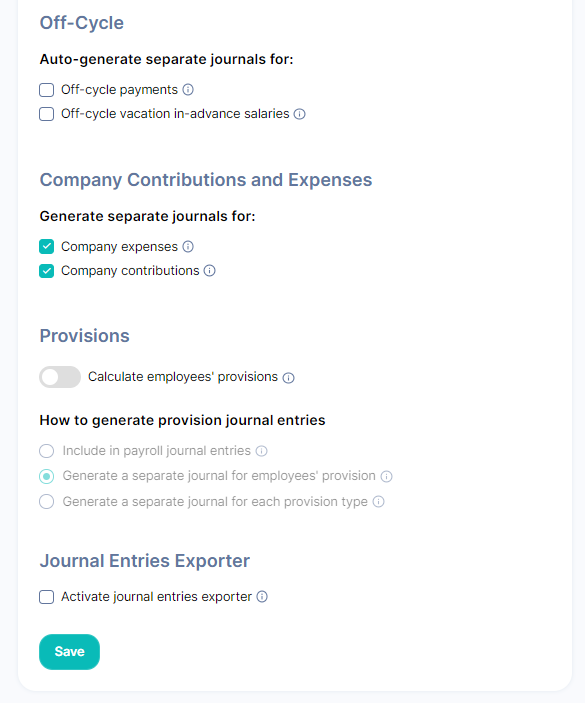
To manually generate off-cycle vacation in-advance journal entries :
Select your user icon in the upper right corner and go to System Preferences → Integration Setup → Journal Entries Structure.
Clear the Auto-generate separate journals for off-cycle vacation in-advance checkbox.
Then click “Save”.
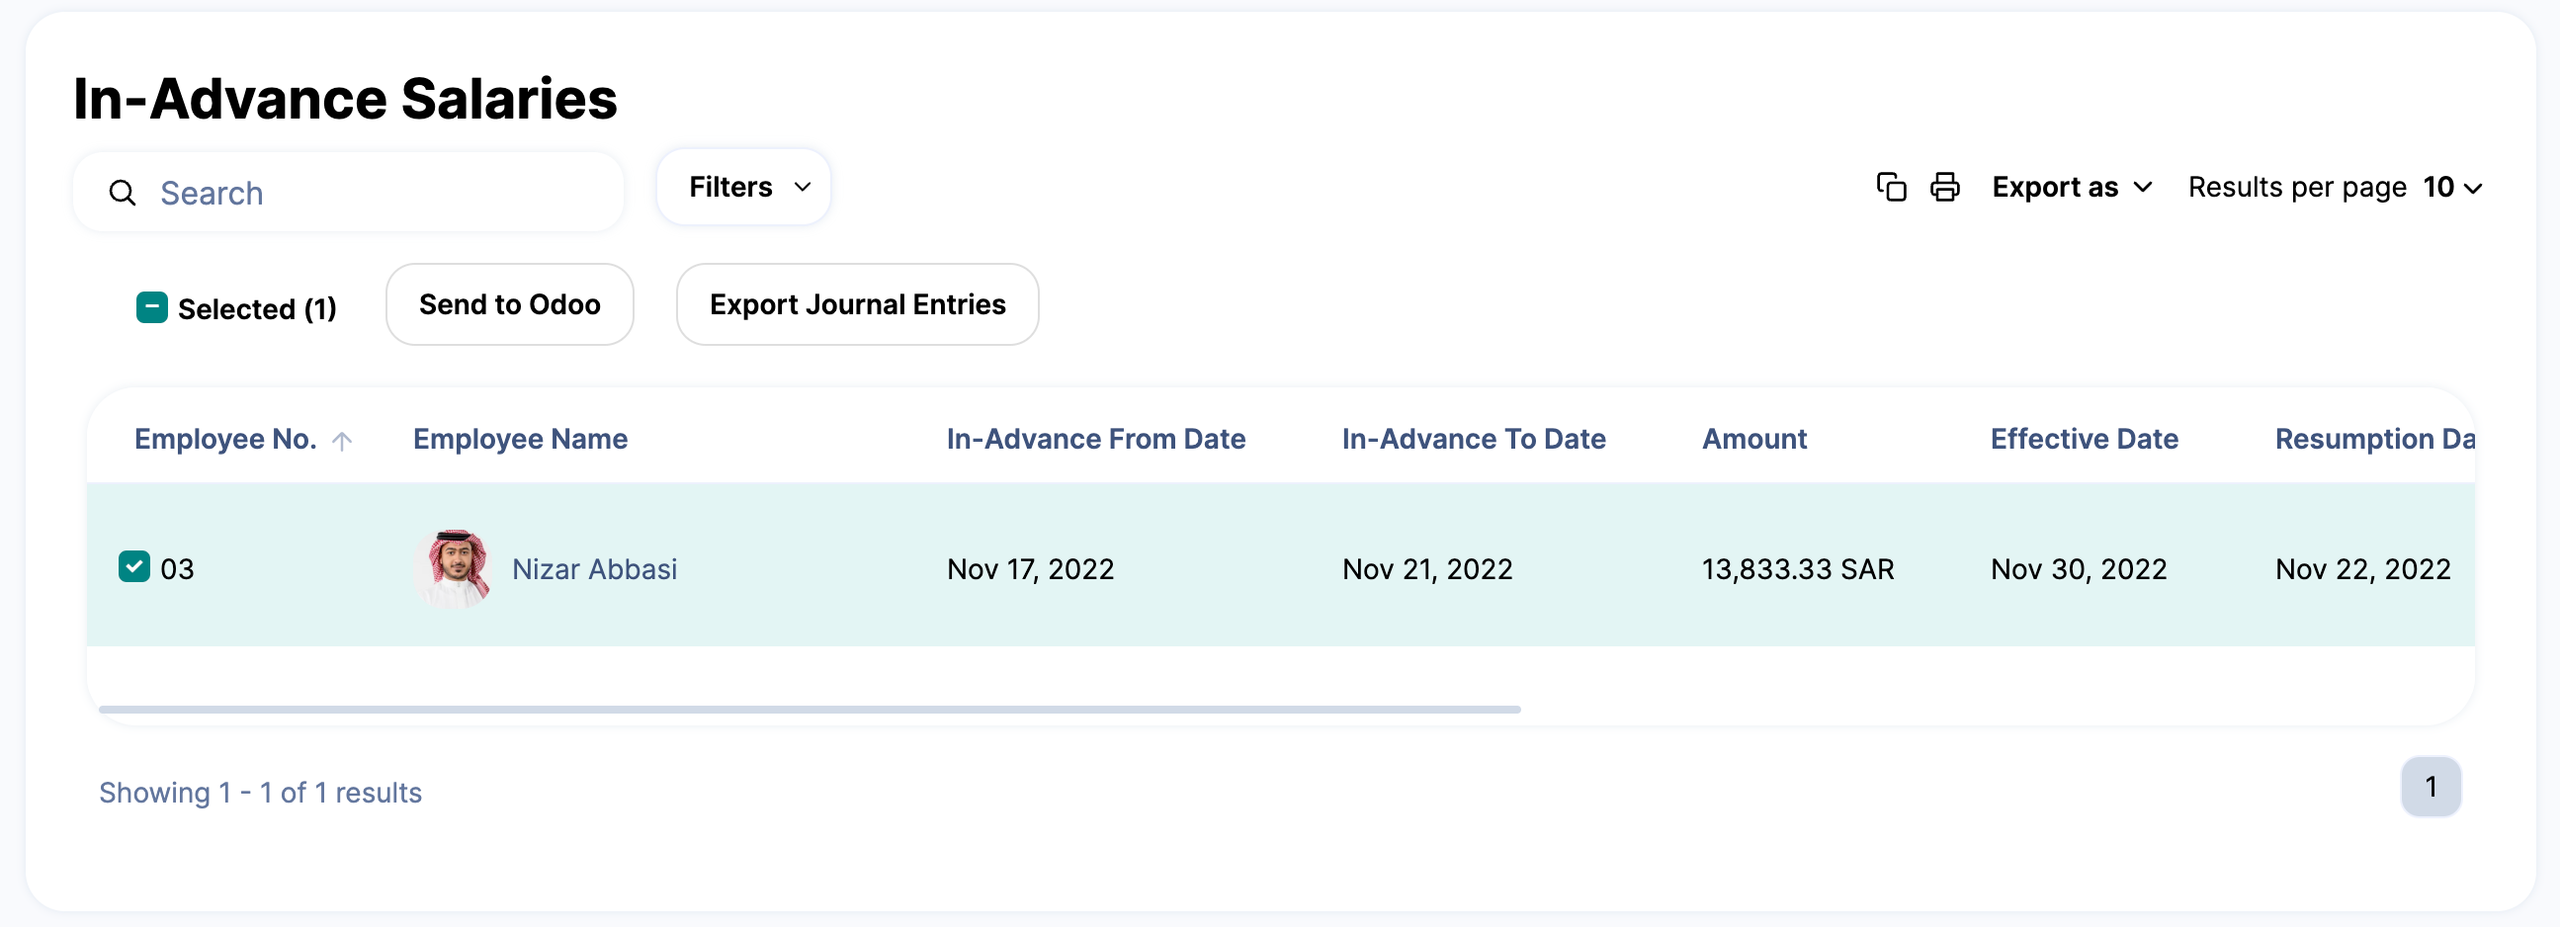
Go to Main Menu → Payroll → Manage Financials → Manage Vacation In-Advance Salary.
Use the “In-advance from date” and “In-advance to date” filters to select the required time period.
Under Payroll status, select Off-cycle, then select Apply Filters.
Then, under the Employee No. column, select the in-advance salaries you wish to include in your exported journal entries. Or you can select all the filtered salaries by clicking the “Select all” checkbox.
Then click “Send to Odoo”, and your off-cycle vacation in-advance salaries will be transferred as journals.
Post Provisions From ZenHR to Odoo
To auto-generate journals for provisions and post them with your payroll journal entries, follow these steps:
Select your user icon in the upper right corner and go to System Preferences → Integration Setup → Journal Entries Structure
Enable the Calculate employees' provisions toggle.
Enable the Auto-generate journal entries for employees' provisions toggle.
Select the desired option under “How to generate provision journal entries”.
click “Save”.
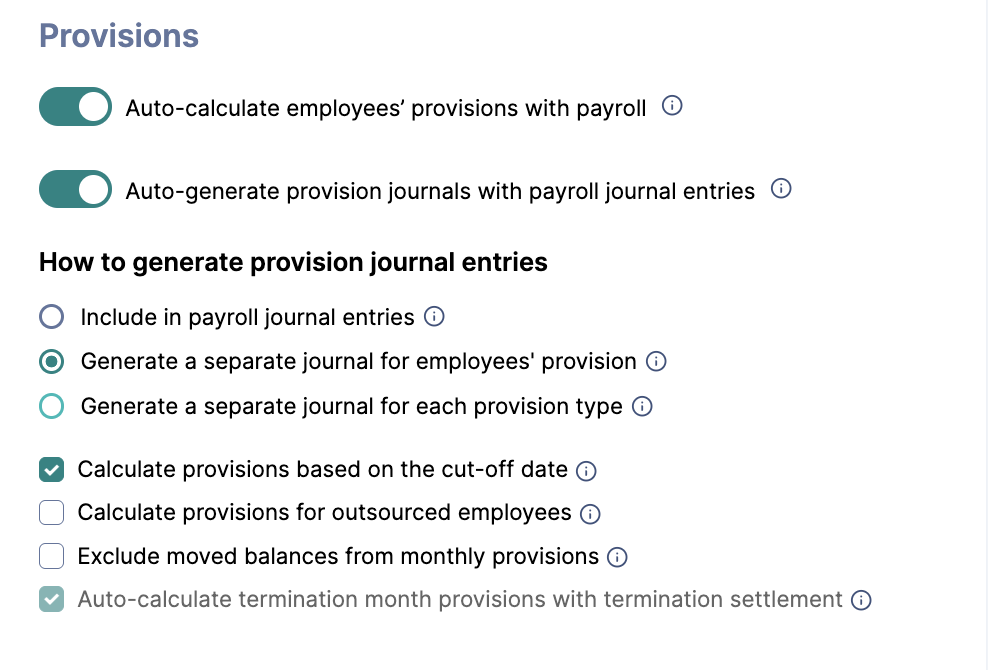
You can then post salaries from ZenHR to Odoo, and the transferred journals will include journal entries for your provisions.
To manually generate provisions journal entries, follow these steps:
Select your user icon in the upper right corner and go to System Preferences → Integration Setup → Journal Entries Structure.
Activate Calculate employees' provisions toggle.
Deactivate the Auto-generate journal entries for employees' provisions toggle.
Select the desired option under select “How to generate provision journal entries”.
Click “Save”.
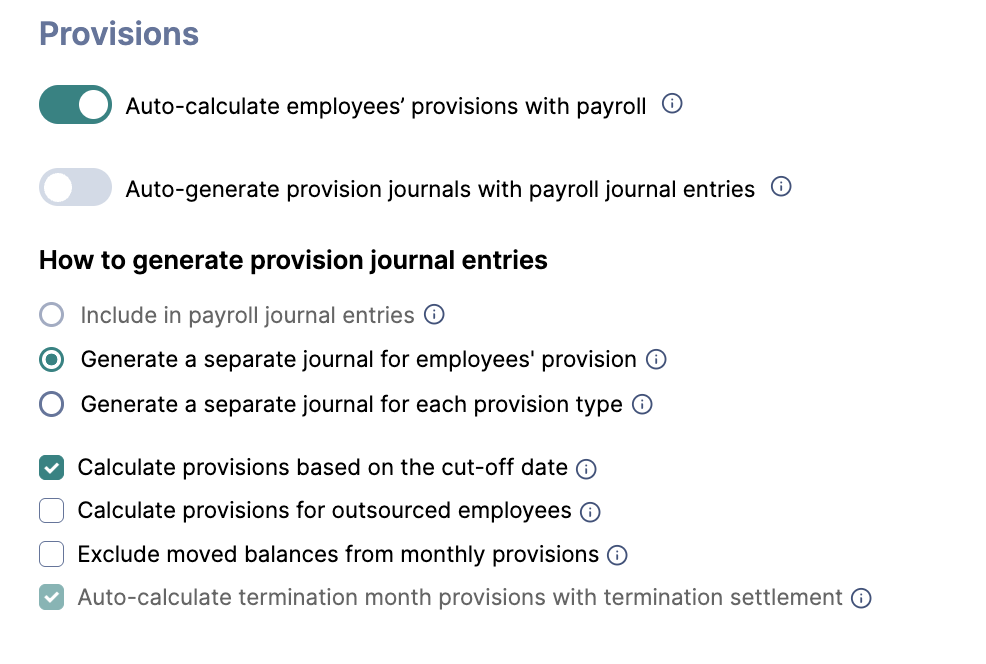
Then on the left side of the page, go to Main Menu → Payroll → Manage Monthly Provision.
Enter the desired salary Year and Month for all employees, and click “Filter”.
Then click the “Send to Odoo” and your provisions will be transferred as journals.
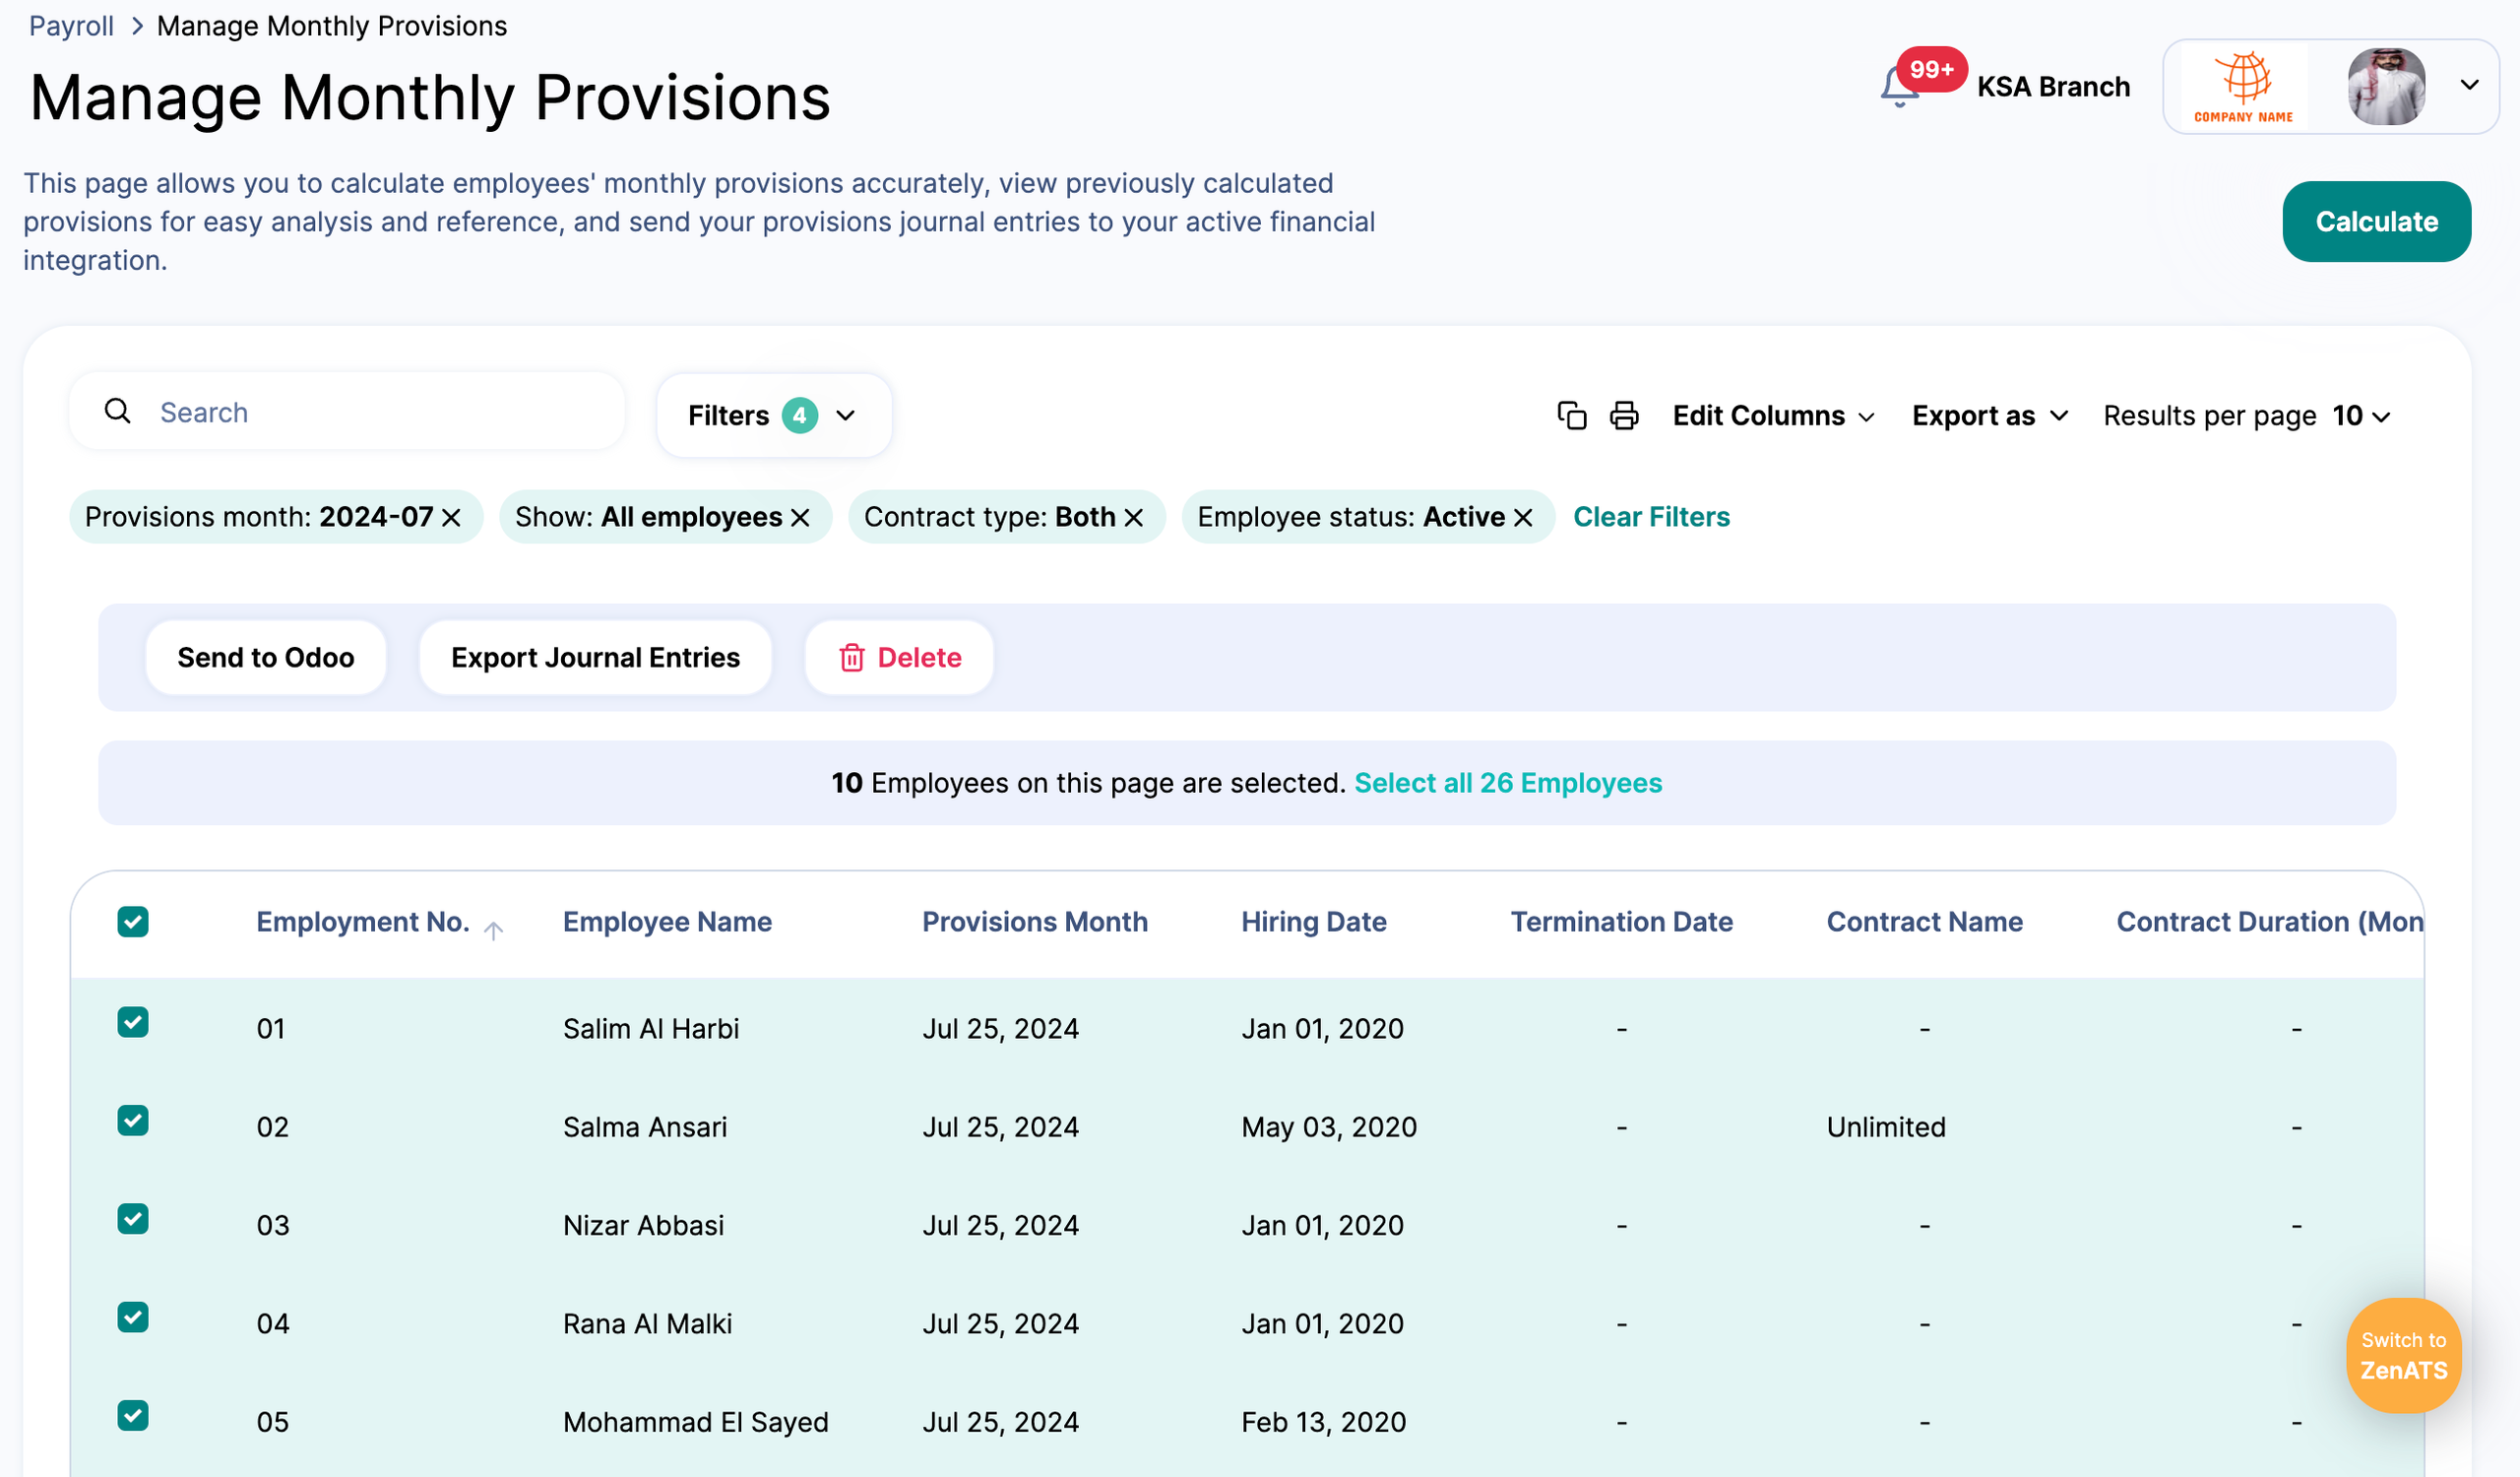
Note: You must filter the “Date from” and “to” filters for the "Send to Odoo" button to appear.
Odoo Event Viewer
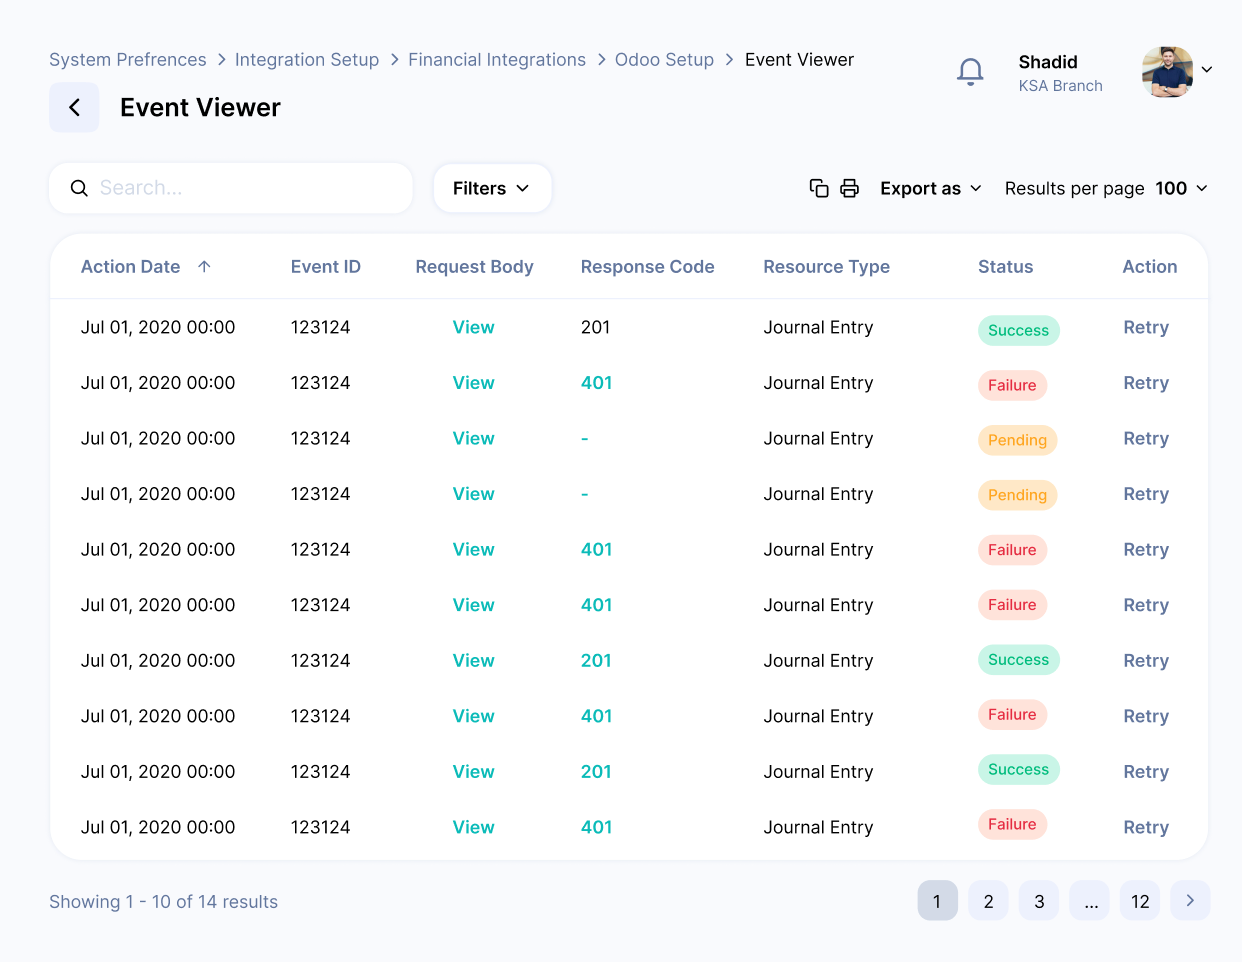
As with any integration, monitoring is essential to track events and activities. ZenHR provides the Odoo Events Viewer, which allows you to track all integration activities, view their statuses (such as successful, failed, or pending), and identify any errors that occur during data transfer.
This tool also enables you to retry failed events without needing to resend data manually, ensuring smooth and reliable synchronization between both systems.
To access the Odoo Events Viewer:
Go to User Menu → System Preferences → Integration Setup → Financial Integrations → Odoo Setup.
Select Retry to resend any failed events and complete the synchronization process.
Comments
0 comments
Please sign in to leave a comment.